

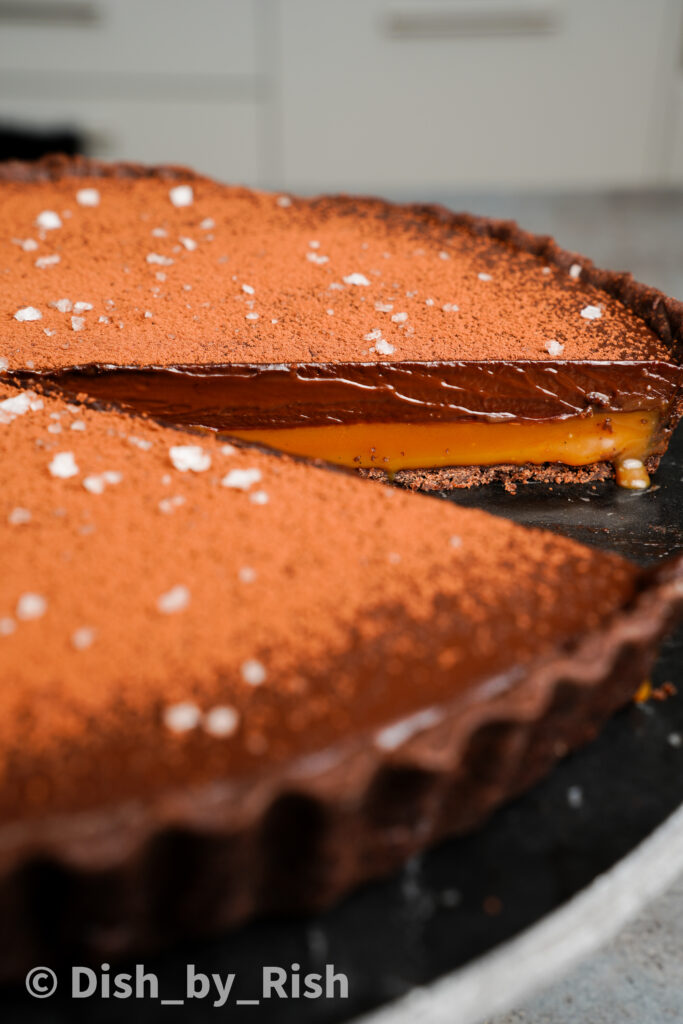
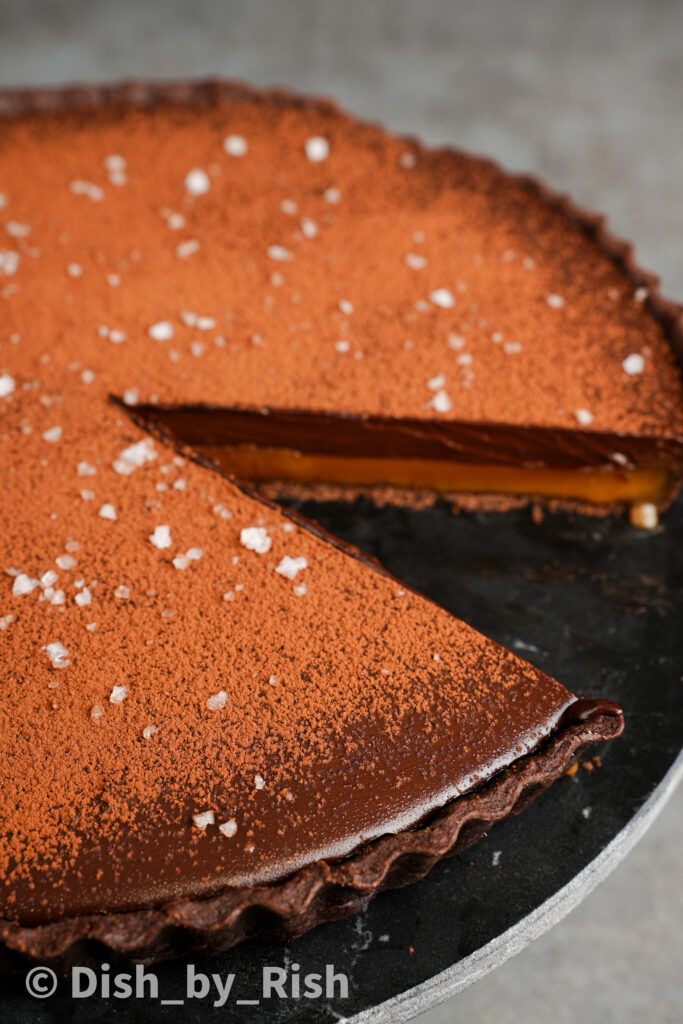
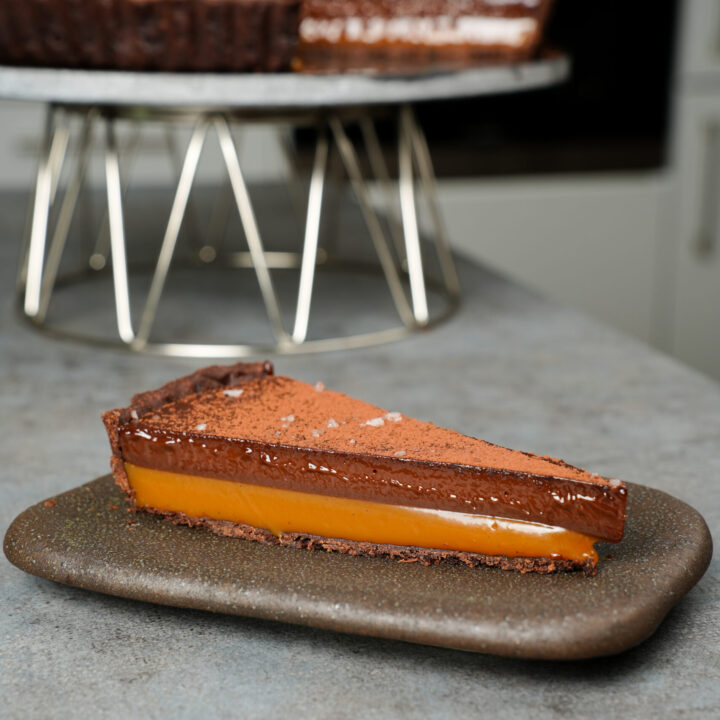
This Salted Caramel Chocolate Tart has a chocolate shortcrust base, with a velvety smooth salted caramel, and finally a rich chocolate ganache.
This is definitely a dessert to get excited by, especially if you’re a a salted caramel or chocolate fan. Even better if you’re both!
Bring this chocolate tart out at any dinner party or any celebration, and I guarantee you’ll have some very happy guests.

Salted Caramel Chocolate Tart
I’m a huge chocolate tart fan. The rich chocolate ganache paired with flaky, buttery, chocolate shortcrust pastry is a combination of decadence and indulgence.
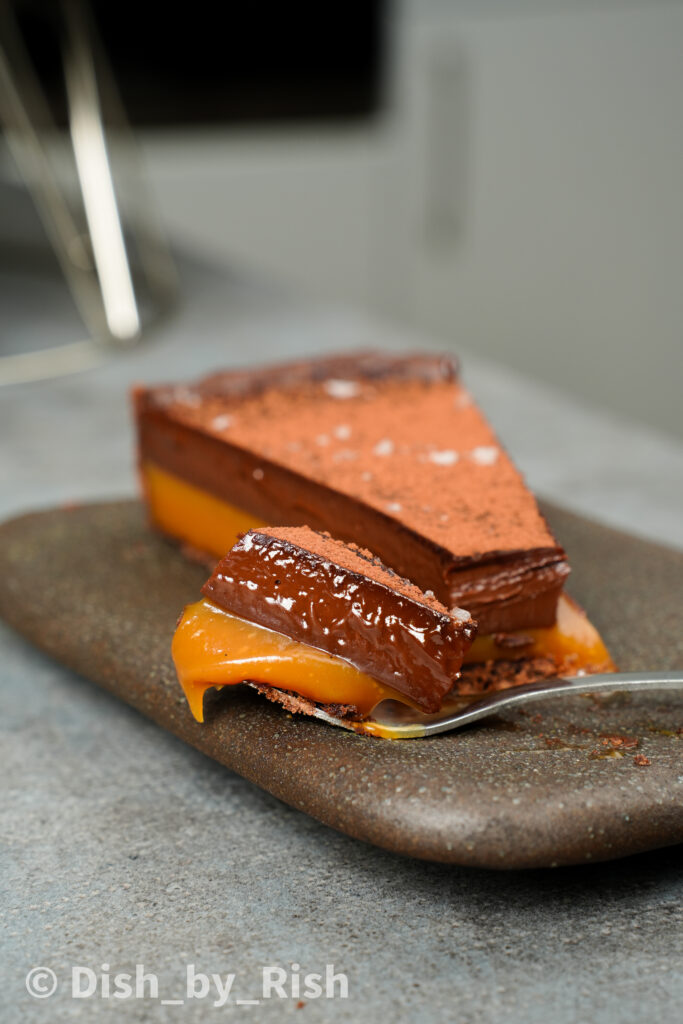
But I don’t see why the decadence has to stop there. A layer of salted caramel is the perfect addition to an otherwise already perfect dessert. Beneath the layer of melt-in-the-mouth chocolate ganache, you’ll find a just-set layer of salted caramel.
Sweet and salty is always the way to go.
This Salted Caramel Chocolate Tart has 3 DELICIOUS layers
- Chocolate shortcrust pastry – a flaky and buttery tart pastry that we’re making from scratch. We’re also adding in some cocoa powder for an extra whack of chocolate flavour
- Salted caramel – a just-set layer of salted caramel that adds the perfect salty sweetness to complement the bitter and rich chocolate. We’re also making this from scratch too, and it takes less than 10 minutes!
- Chocolate ganache – a rich melt-in -the-mouth chocolate layer that has the texture of a soft chocolate truffle

We’re making the chocolate shortcrust pastry from scratch
We’re making each layer from scratch here. And they all tend to be things that I’ve heard people say they’re often nervous about making.
I’m breaking down the steps in as much detail as possible to guide you through these 3 elements. In the hope that you’ll come out the other side with a new found confidence, questioning why you ever felt nervous in the first place.
The chocolate shortcrust pastry is made with just flour, cocoa powder, sugar, butter, milk, and a pinch of salt. I make the entire dough in a food processor and then pop it straight into the fridge to chill.
Making homemade salted caramel is easier than you think
Making a caramel from scratch takes under 10 minutes. That’s honestly it, it’s a quick process that just requires a bit of whisking and mixing.
And the basis of every caramel is just three ingredients, sugar, butter, and cream. Vanilla is always a welcomed addition and I do love a good hint of salt to balance the sweetness.

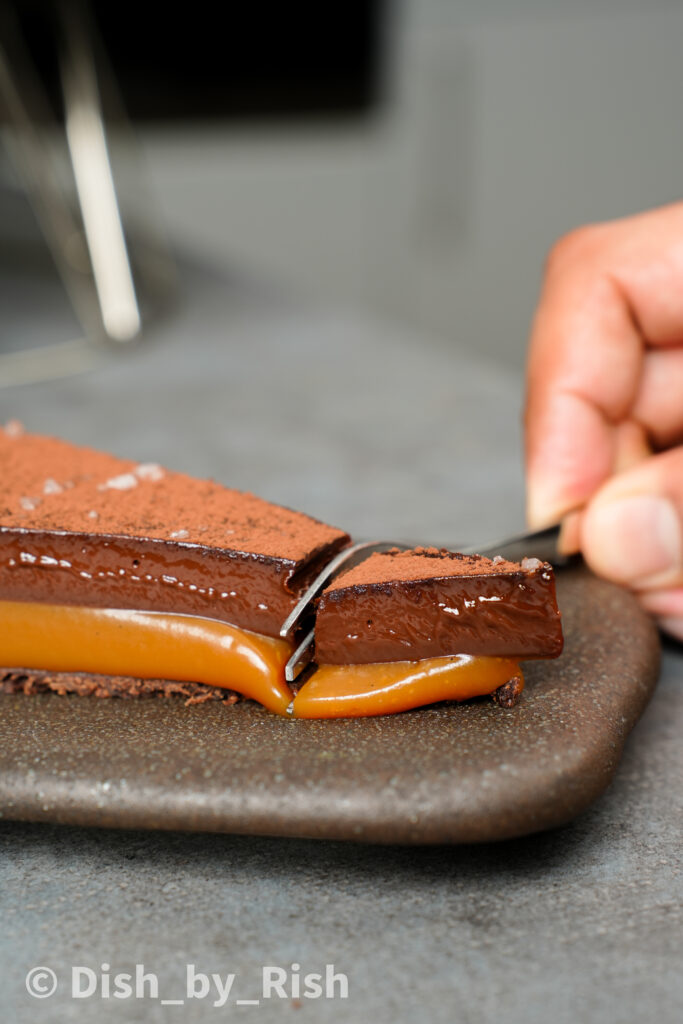
The ratio of caramel to chocolate matters
Personally, I love and appreciate an equal layer of both. This way you get a good mouthful of caramel and that chocolate truffle-like ganache at the same time.
My pet peeve is when the chocolate ganache is just a tiny and thin layer on top of the caramel. We deserve more. However you can totally adapt the measurements to scale up or scale down based on the ratio that you would prefer.
Salted Caramel Chocolate Tart serving suggestions
I’ve had friends and family ask for a little dollop of whipped cream or a scoop of ice cream on the side. If you’re serving it with whipped cream, whip it to soft peaks and I’d recommend leaving it unsweetened or just very lightly sweetened.
For ice cream fans, a scoop of some good quality vanilla ice cream would be a treat. However if you prefer a bit more balance, I think a scoop of espresso ice cream works wonders here. The bitterness of coffee balances the sweetness and richness from the tart.
Or if you want to enjoy it the way that I do, a shot of espresso to sip on whilst you indulge in this tart is truly a magnific combination.
Let’s talk about some of the ingredients you’ll need for this Salted Caramel and Chocolate Tart
I’ll cover the main ones below but the full recipe can be found at the end
- Cocoa powder – this is pure cocoa powder, please don’t use the hot chocolate powders as they contain quite a few other ingredients and are often more milk powder and sugar based than actual cocoa
- Caster sugar – this is a more finely ground white granulated sugar. we use caster sugar here as it mixes in more readily. You can make your own by blitzing white sugar in a blender for a few seconds (this is what I do)
- Double cream/heavy whipping cream – this is sold as double cream in the UK and heavy whipping cream in the US
- Chocolate – use your favourite slab of high quality chocolate here. That’s going to be the entire flavour of the ganache, so make sure it’s a bar you really, really like. I personally love using 70% dark chocolate for this as I like the bitter notes for balance
The KEY tips to getting this recipe right
- Don’t roll out the pastry too thin – this risks the pastry breaking and tearing when rolling and transferring on top of the tart tin. Don’t go any thinner than 3mm
- Use a silicon spatula for the caramel, not a metal spoon – when melting the sugar, gently move it around with a silicon spatula to ensure an even caramelisation. Metal utensils make sugar seize and crystalise, which is what we want to avoid
- Don’t overheat the cream for the ganache – if the cream is too hot, it can make the ganache split and turn grainy. You just want the sides of the cream to be steaming in the pan, it should not be at a simmer or boil
How to make this Salted Caramel Chocolate Tart
How to make the chocolate shortcrust pastry
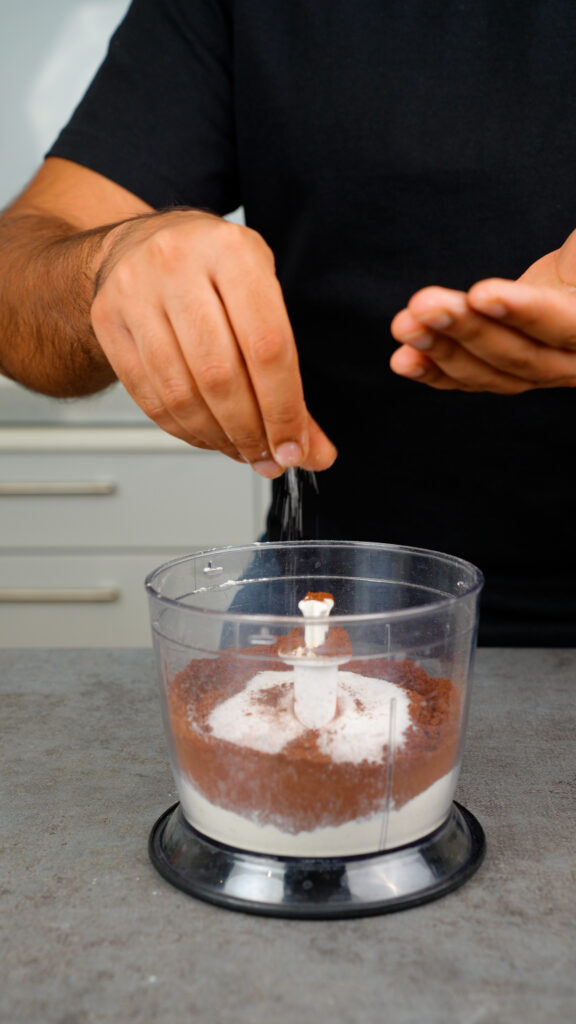
1) Add flour, cocoa powder, salt, and sugar to a food processor. You can also do this without a food processor if you wanted to, just mix in a bowl
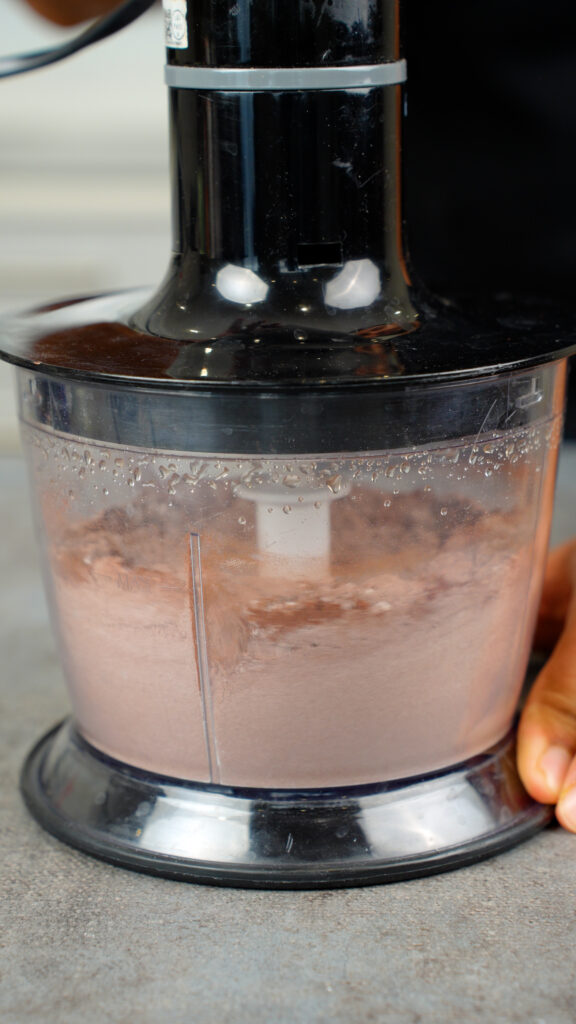
2) Blitz/mix everything together
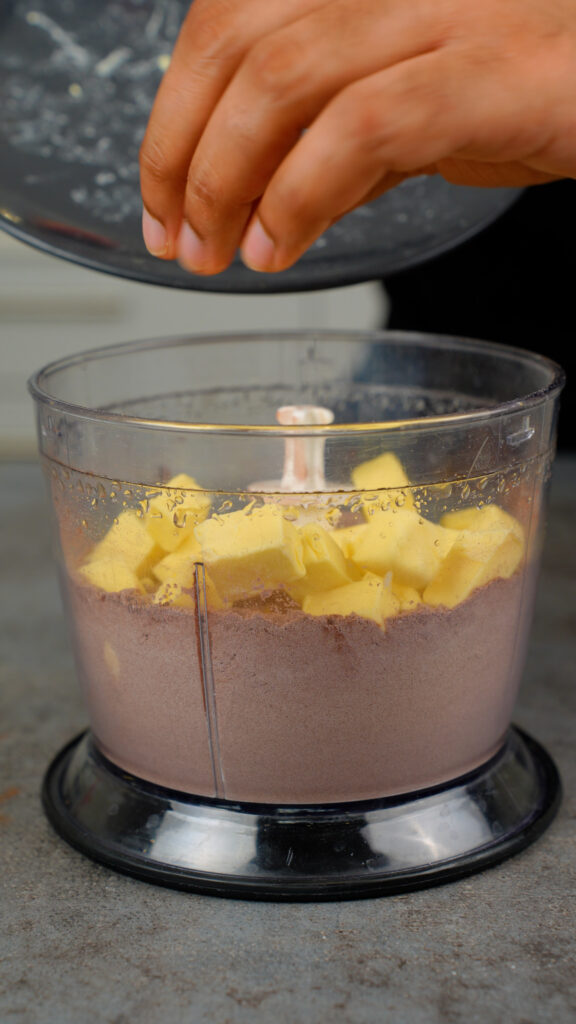
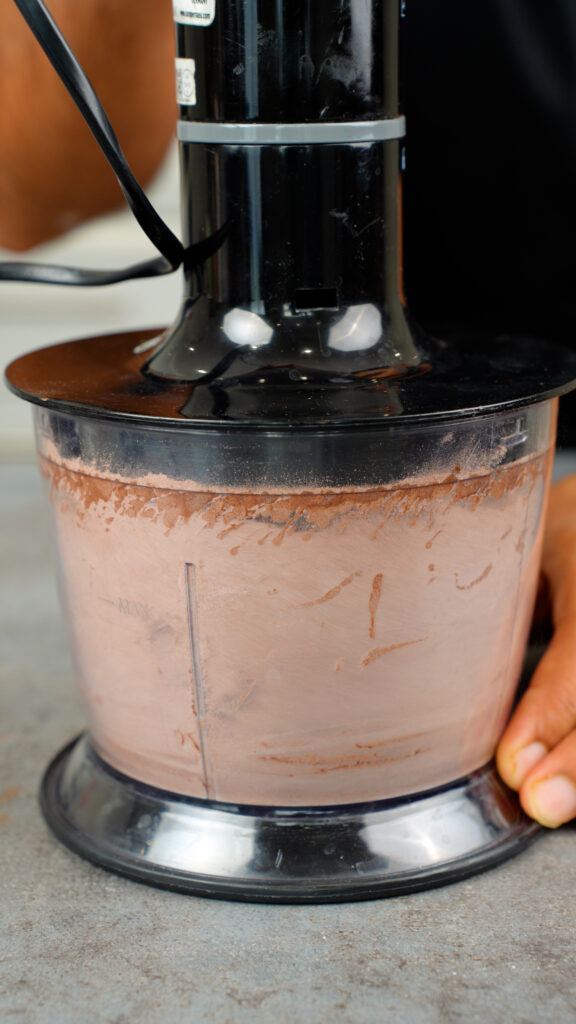
3) Add in cold cubes of butter (I place the cubes of butter in the freezer for 30 minutes beforehand to ensure they stay cold)
4) Blitz till the butter is well incorporated throughout. Either a sandy texture or small lumps of butter throughout is what we’re aiming for. If mixing by hand, use a pastry blender or fork
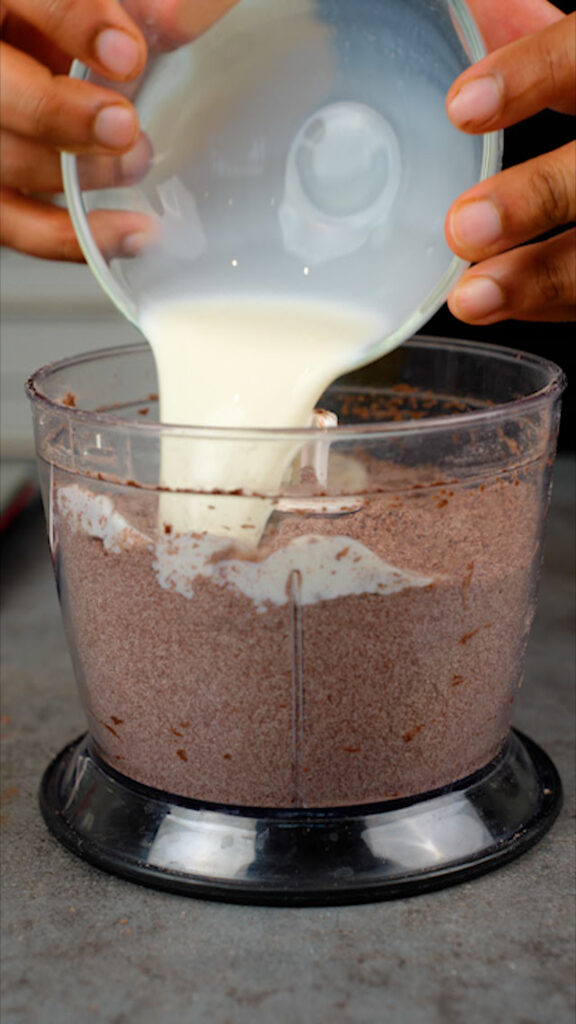
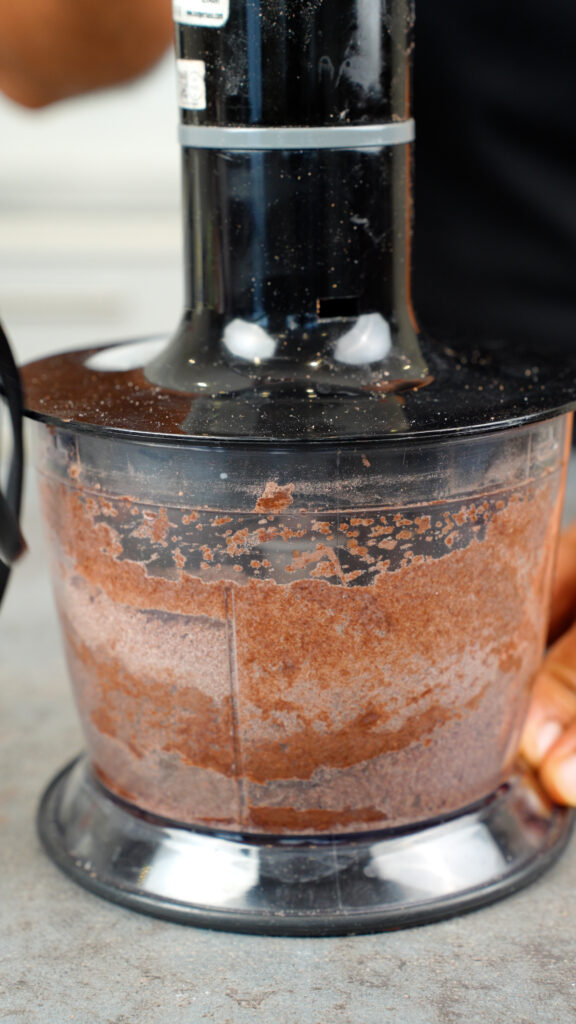
5) Add in the cold milk
6) Pulse/mix briefly until incorporated
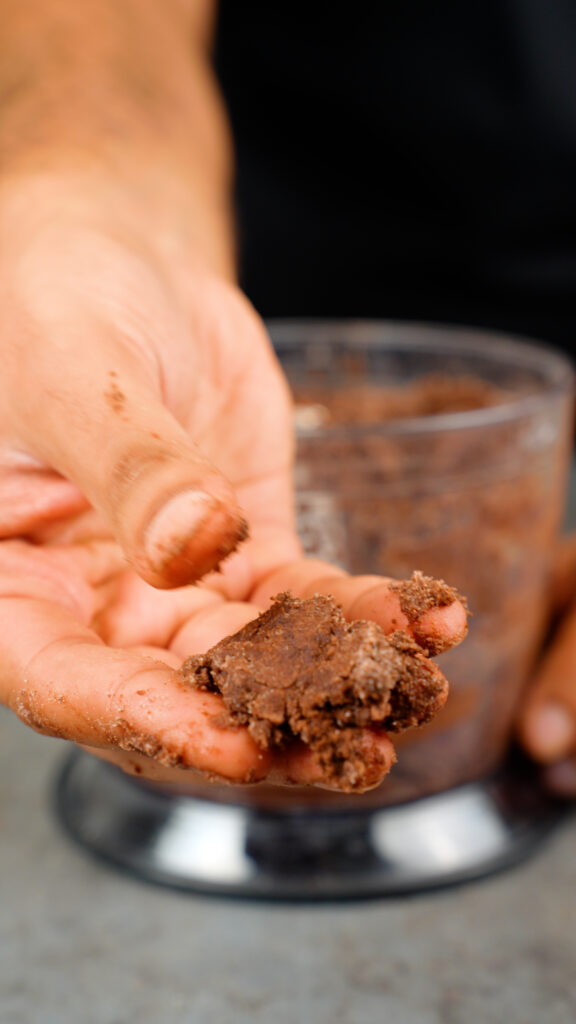
7) You’ll know it’s done when the dough is cohesive
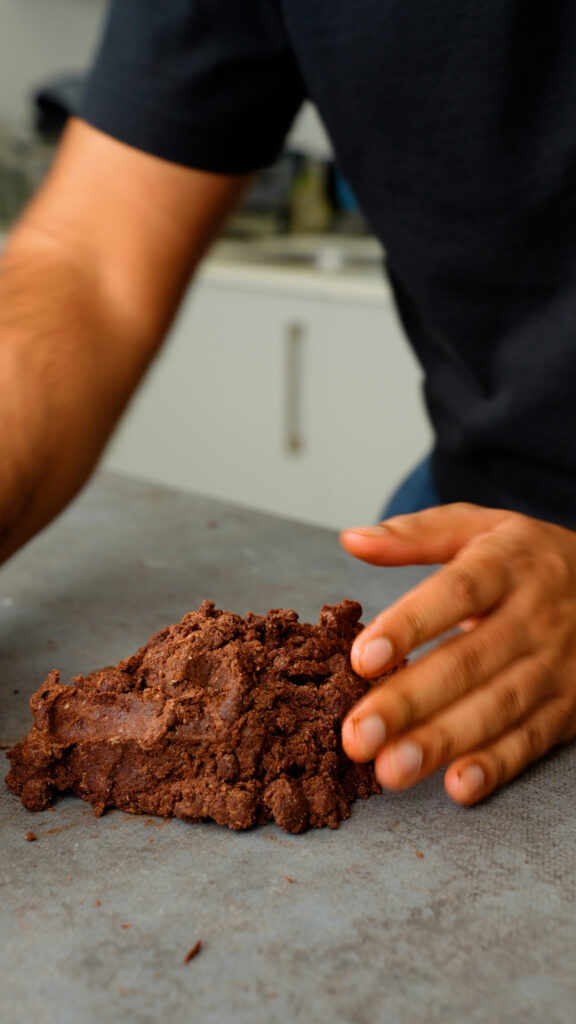
8) Turn the pastry dough out onto the counter
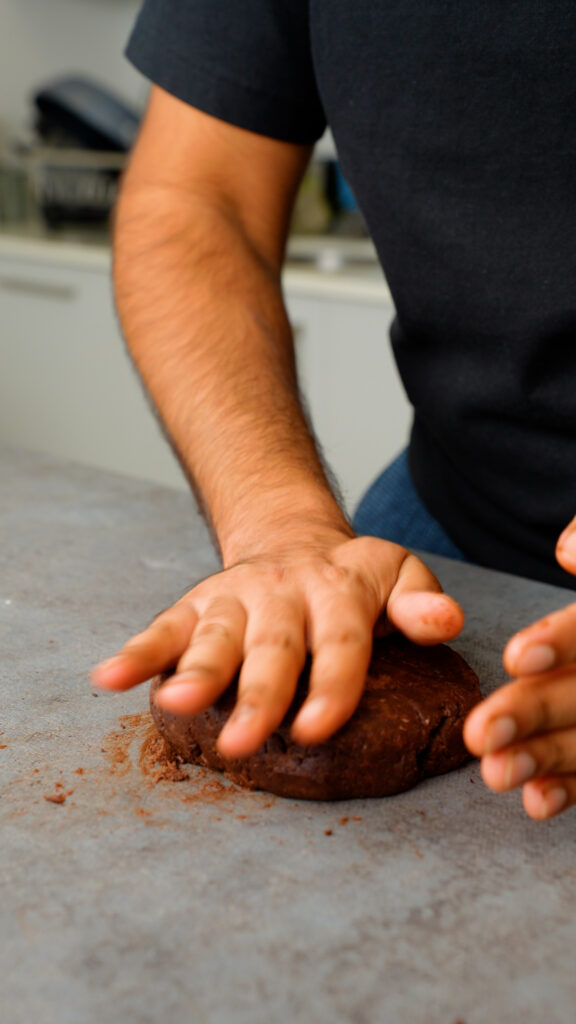
9) Try to avoid kneading, just gather and squash together to form a cohesive dough, then flatten into a disc
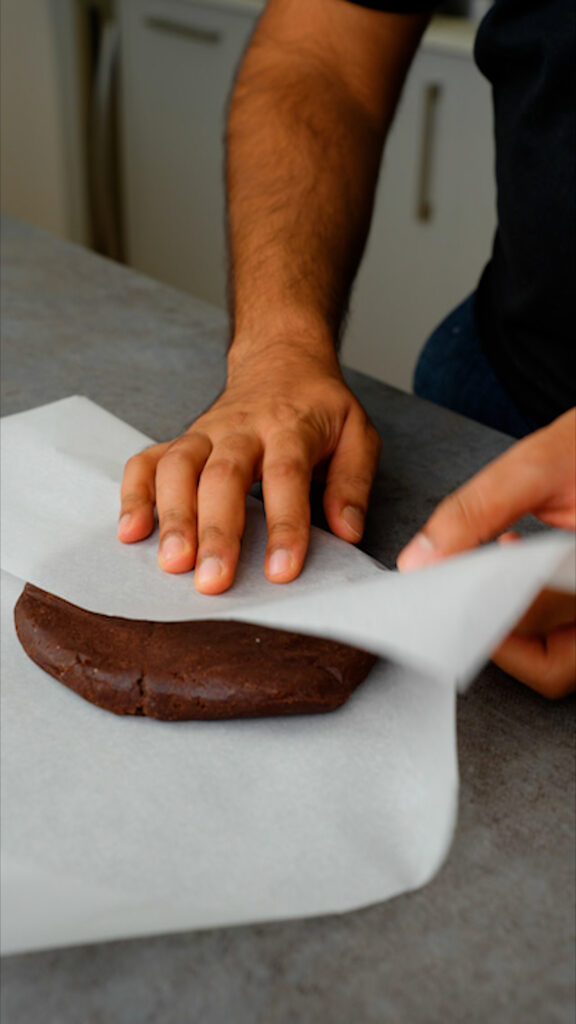
10) Wrap tightly in baking paper or cling film and refrigerate for at least 3 hours
How to roll out and blind bake pastry
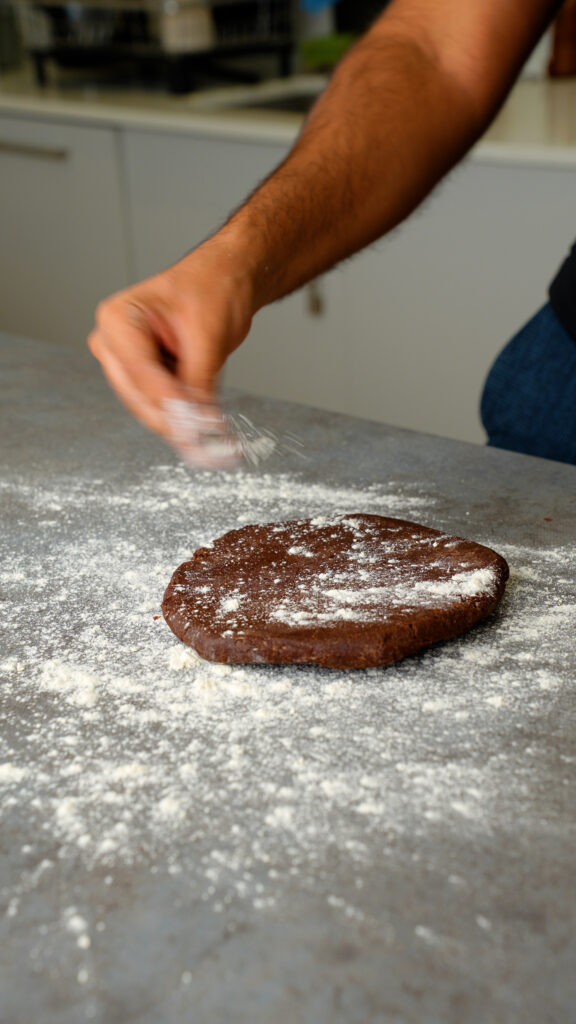
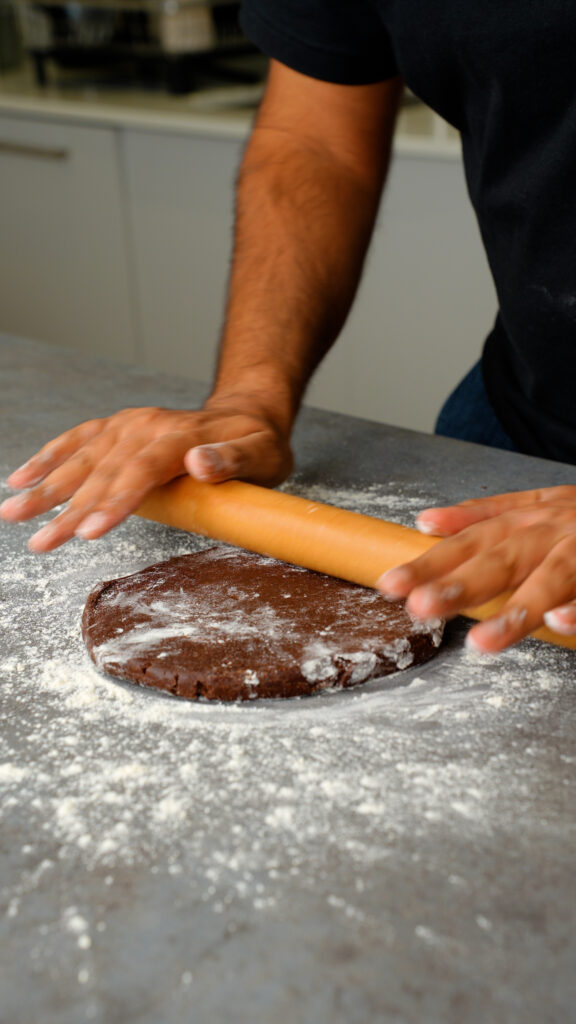
11) Flour the chilled dough and the counter
12) Start rolling out the dough from the midpoint down (in one direction), rotate the dough and repeat. Keep rotating and rolling in one direction to avoid cracks

13) The dough should be no thinner than 3mm and should be about 2 inches larger than the tart tin
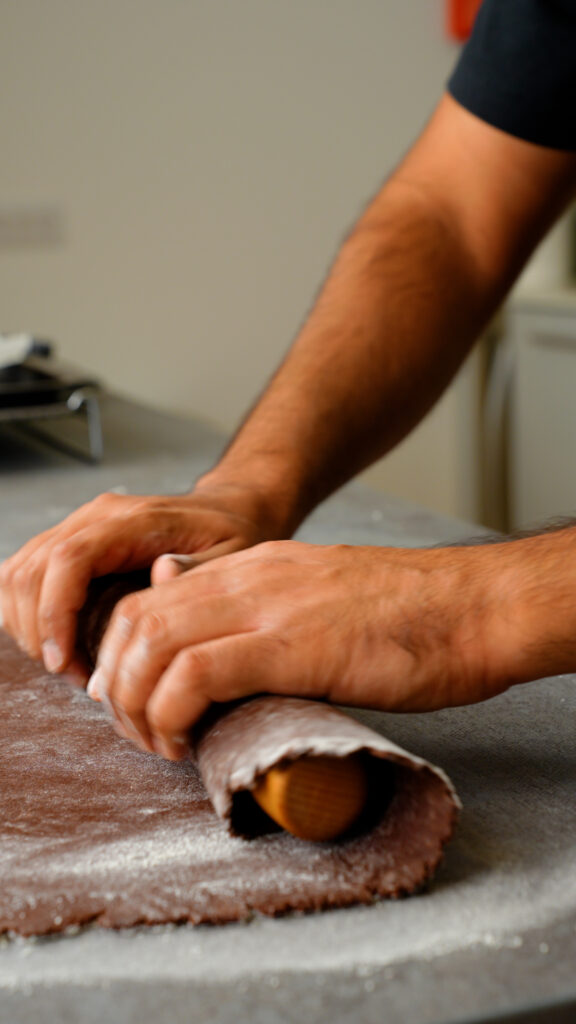
14) Flour the dough and your rolling pin, and roll the dough around the rolling pin
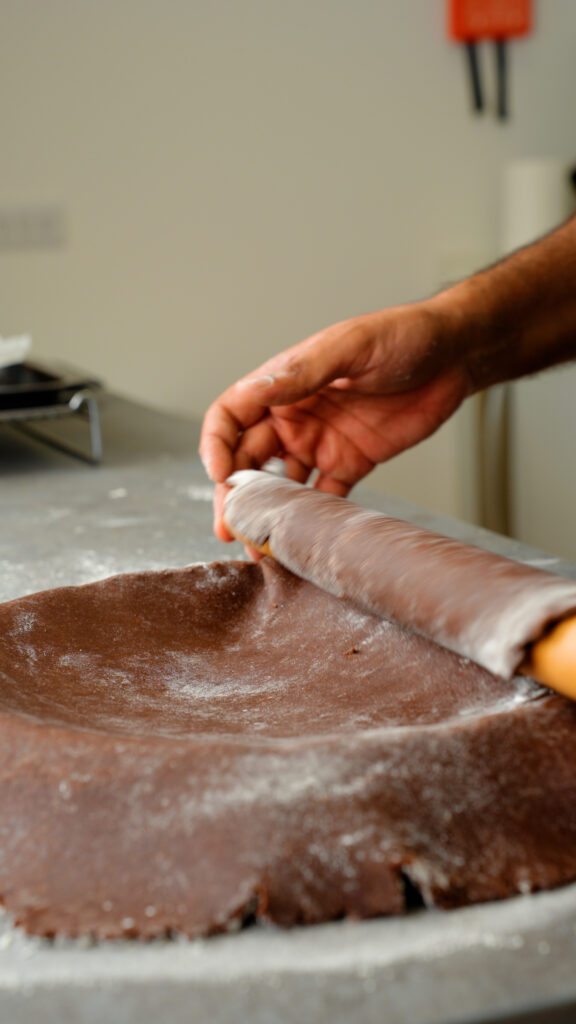
15) Carefully unroll the dough over your tart tin
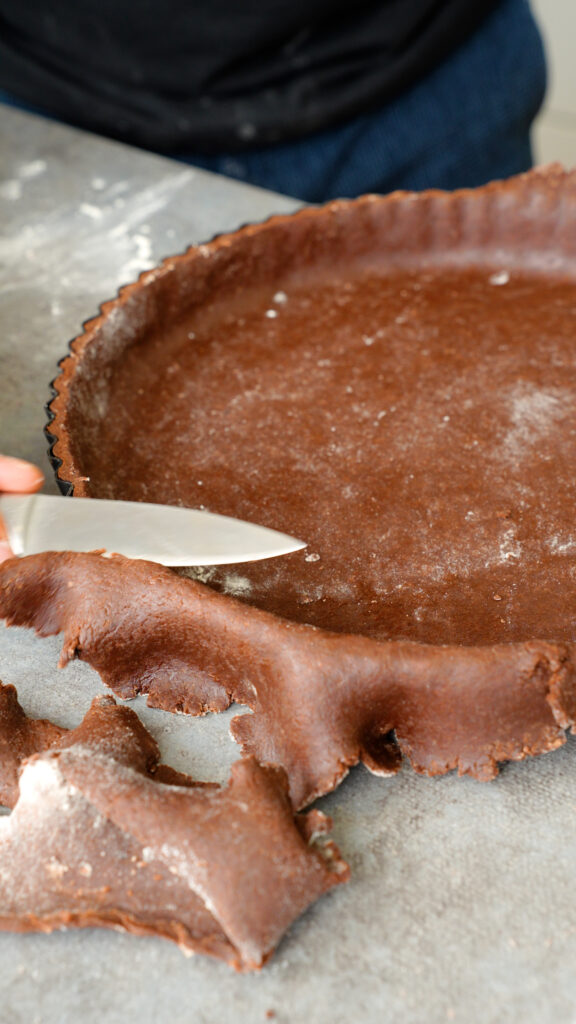
16) Press the dough into the crevices and trim off the excess with a sharp knife. Trim off away from the tin to ensure a clean cut. I could have actually left my dough thicker!


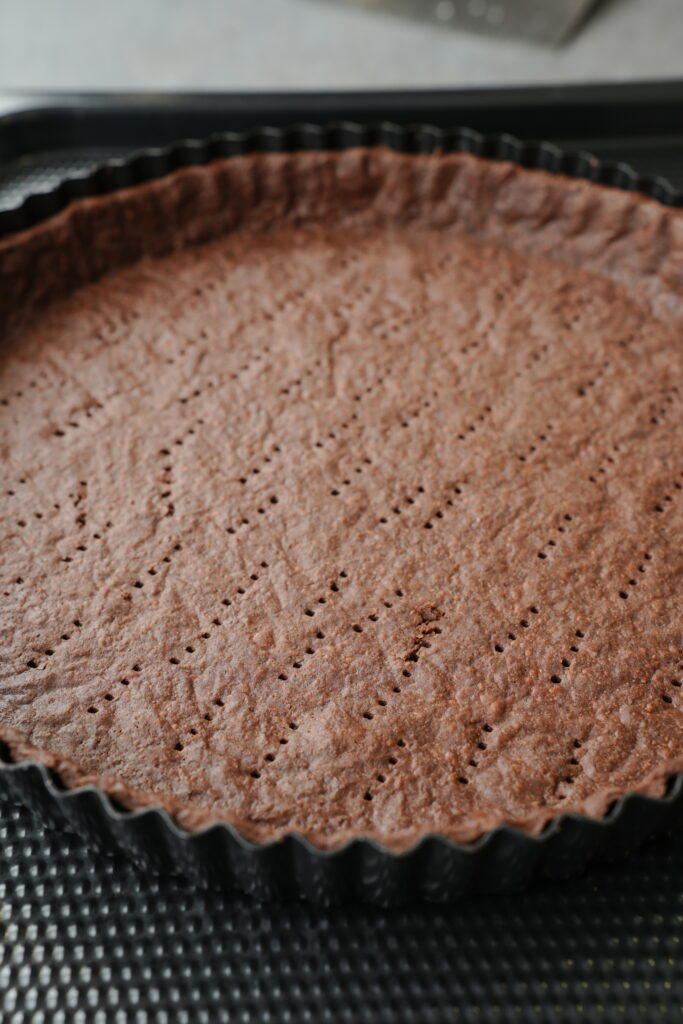
17) Brush off any excess flour then dock all over with a fork. Cover with baking paper or clingfilm, then refrigerate for 30-60 minutes (this will reduce shrinkage post baking)
18) Place the tart tin onto a larger baking tray, this will help with placing it into the oven and taking it out as tart tins can be fiddly. Scrunch up some baking paper and place on top, followed by some baking beans/dried beans/dried rice to weight it down (this is called blind baking)
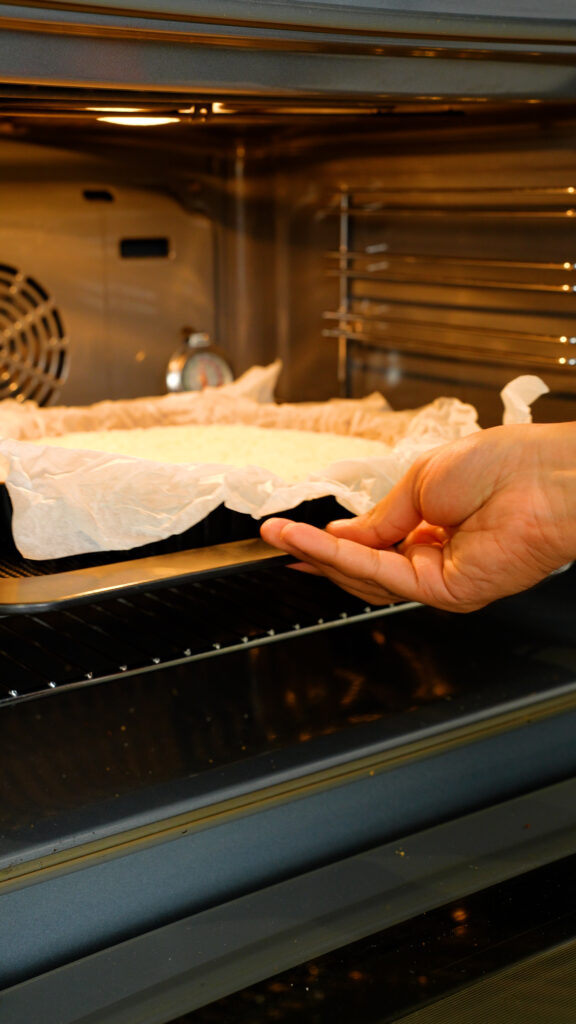
19) Place the tart shell into the oven to bake
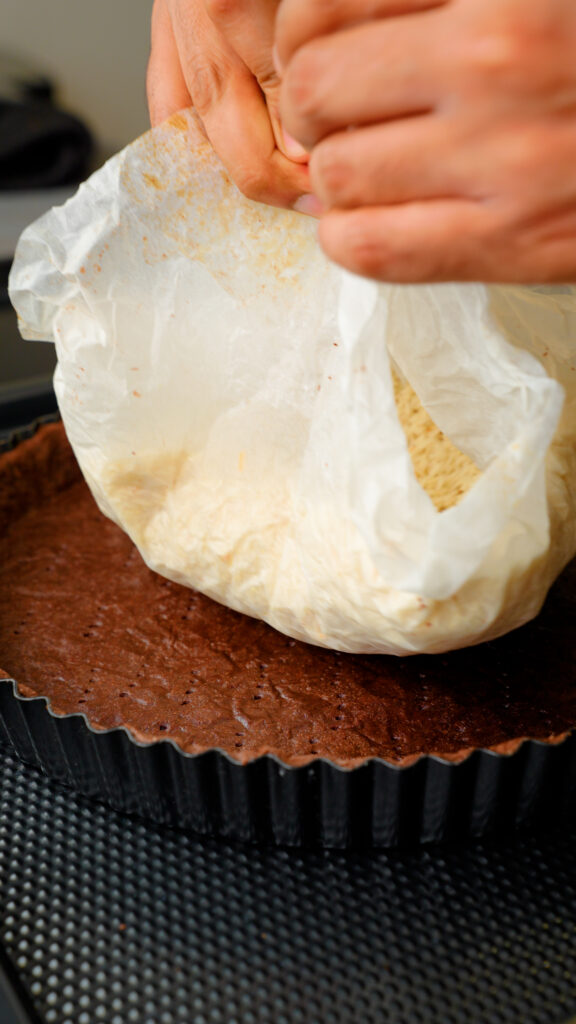
20) Finally, remove the paper and rice just over half way into the bake and place the pastry back into the oven to finish. It should lift off with ease without any sticking – if it sticks then the pastry is underbaked. Place back into the oven for another 5 minutes and then try to remove the paper and rice
Once baked, allow to cool for 15 minutes before carefully removing and transferring to a wire rack to cool completely
How to make salted caramel

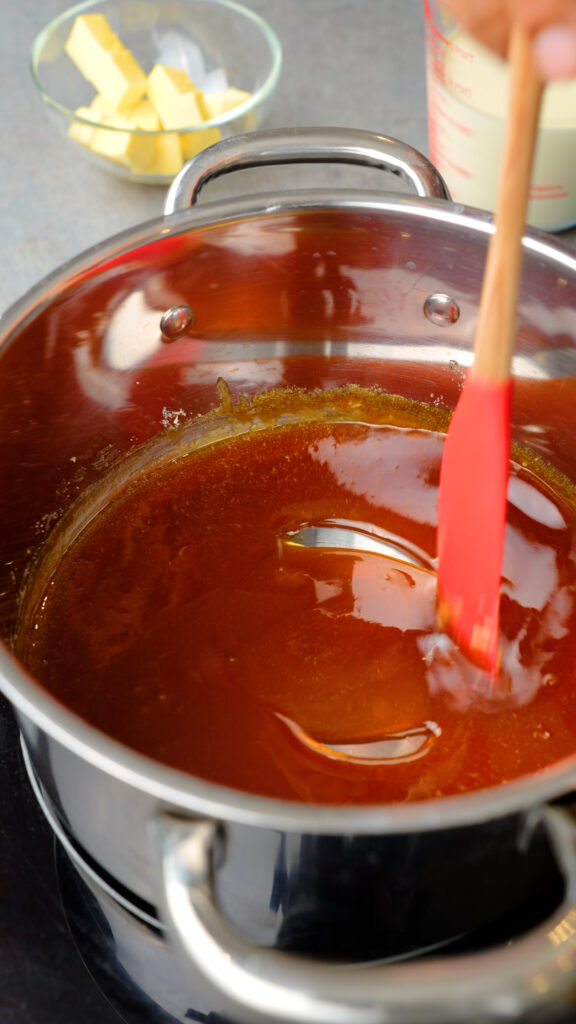
1) For the caramel, start by melting the sugar in a saucepan. Avoid metal utensils here as they can cause the caramel to crystalise
2) I like to take my caramel to a deep amber colour for maximum flavour
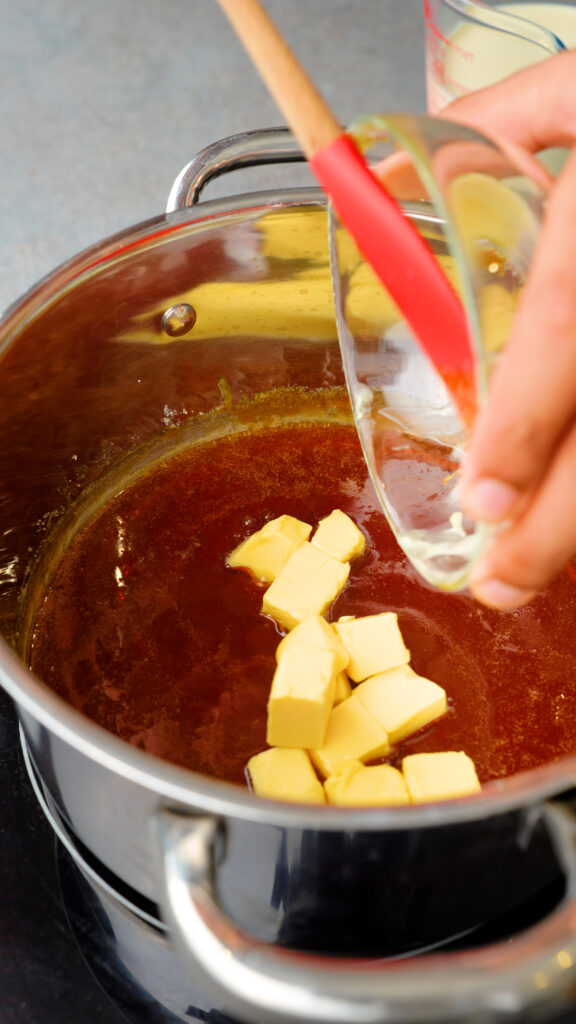
3) Once the caramel reaches a deep amber colour, add in the butter
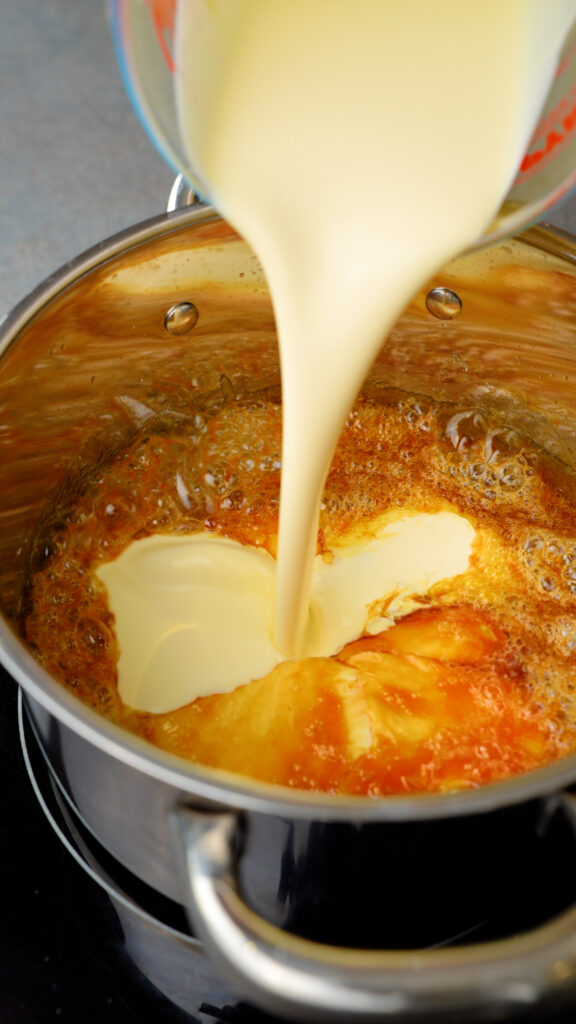
4) Followed by the double cream/heavy cream
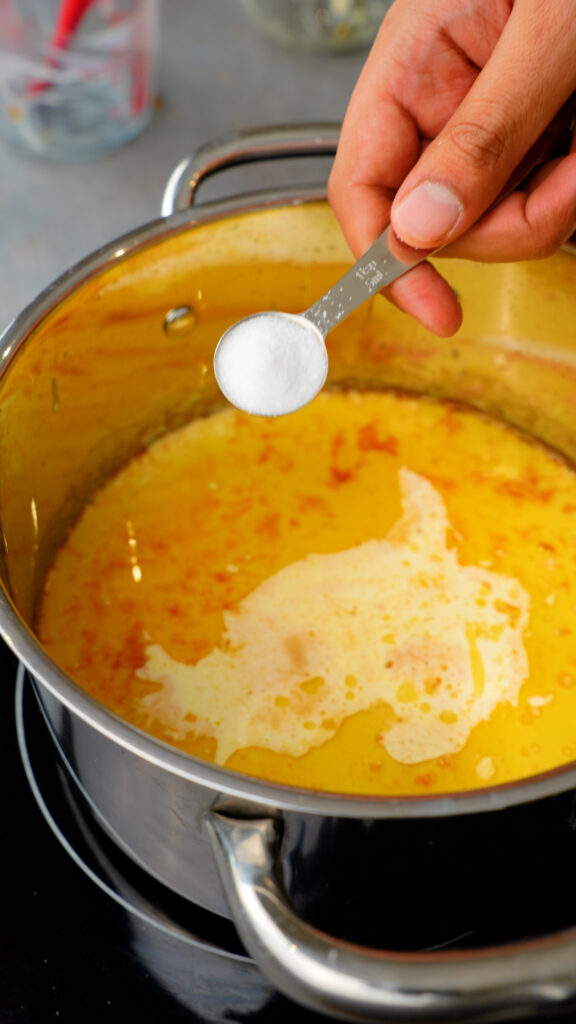
5) Don’t forget to add in some vanilla bean paste/extract and salt
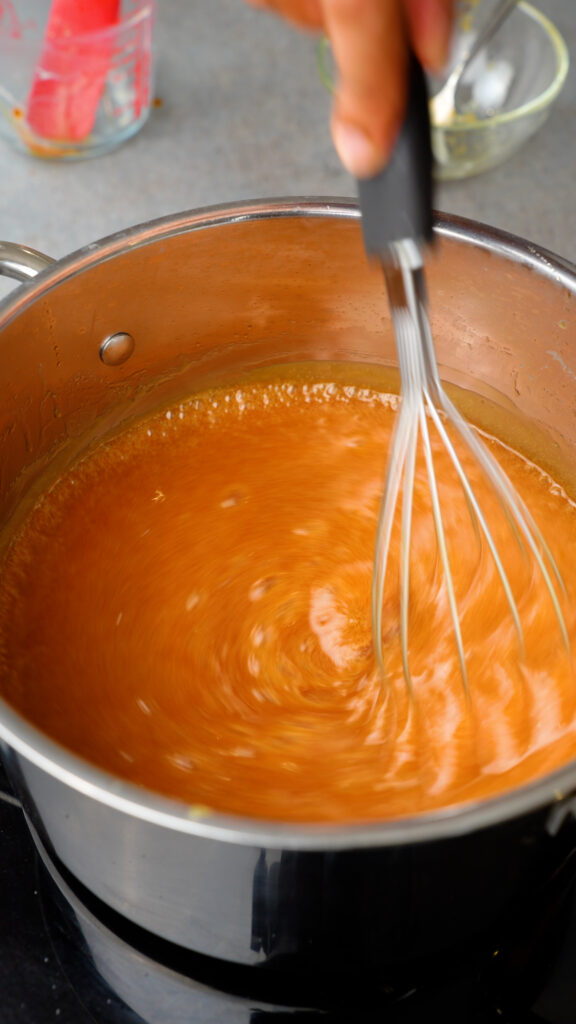
6) Keep whisking and mixing until you’re left with a silky, velvety caramel sauce. You may find the caramel seizes and crystalises when adding the cream, keep whisking over a low heat to help it dissolve. You can also place a lid over the saucepan and whisk every 2 minutes until it’s fully smooth again
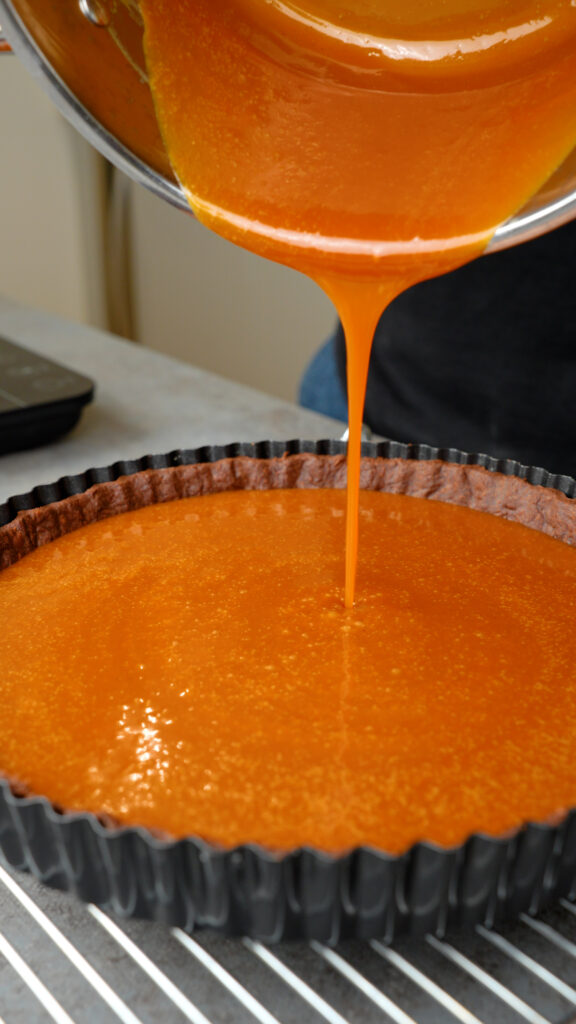
7) Allow the caramel to cool for around 5 minutes, it should still be pourable but just not piping hot. Pour over the chocolate pastry shell and allow to come to cool to room temperature, then refrigerate till completely set
How to make the chocolate ganache
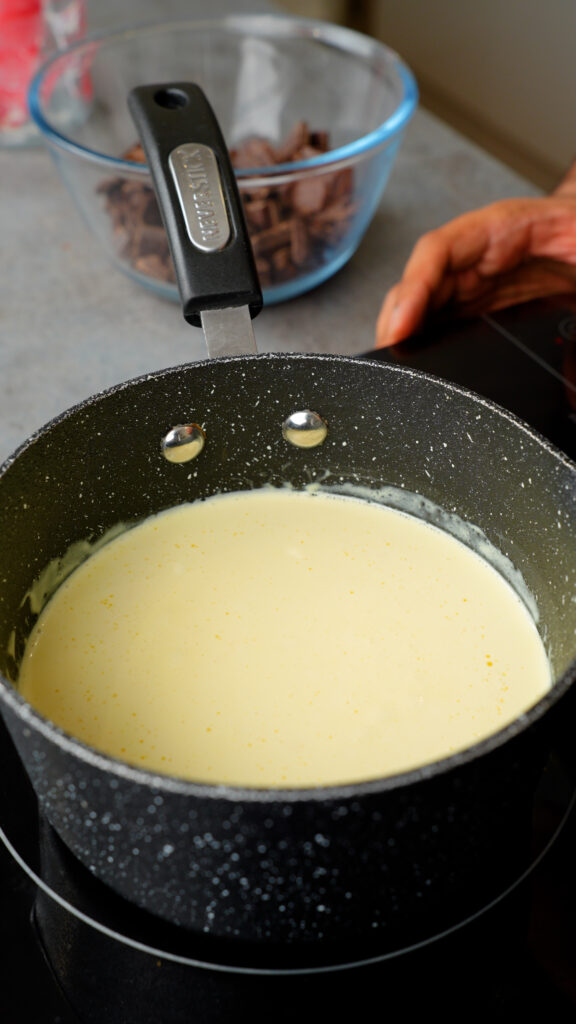
1) For the ganache, start by placing the cream on a medium low to low heat. We just want to see gentle bubbling and steam around the outside. If the cream is too hot, it will cause your ganache to split and turn grainy
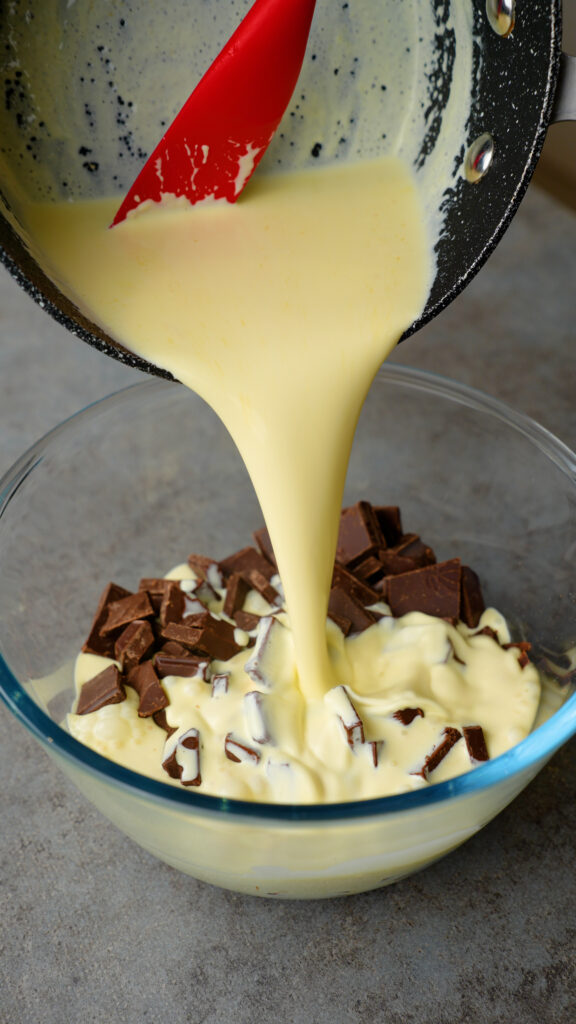
2) Pour the cream over the chocolate
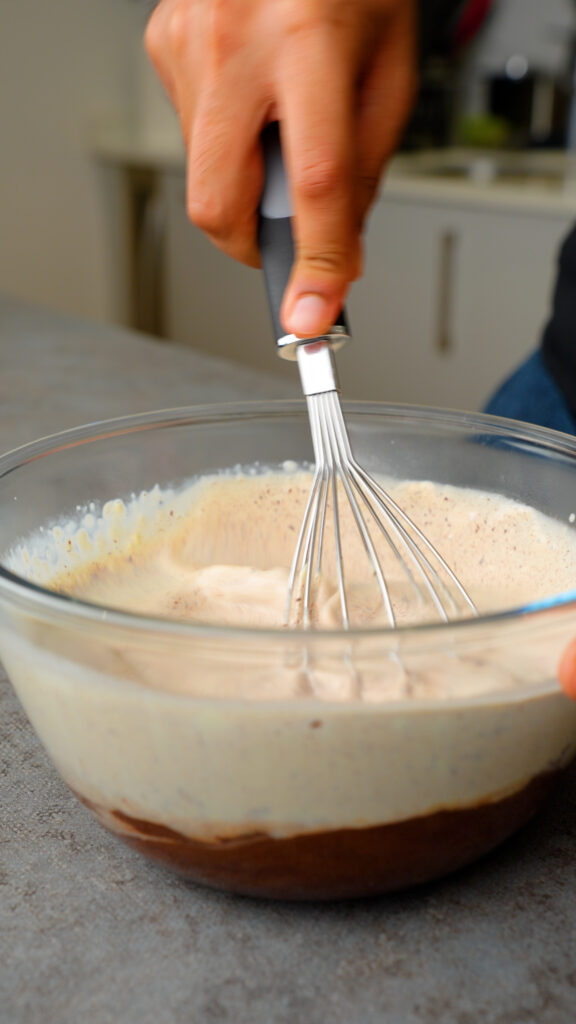
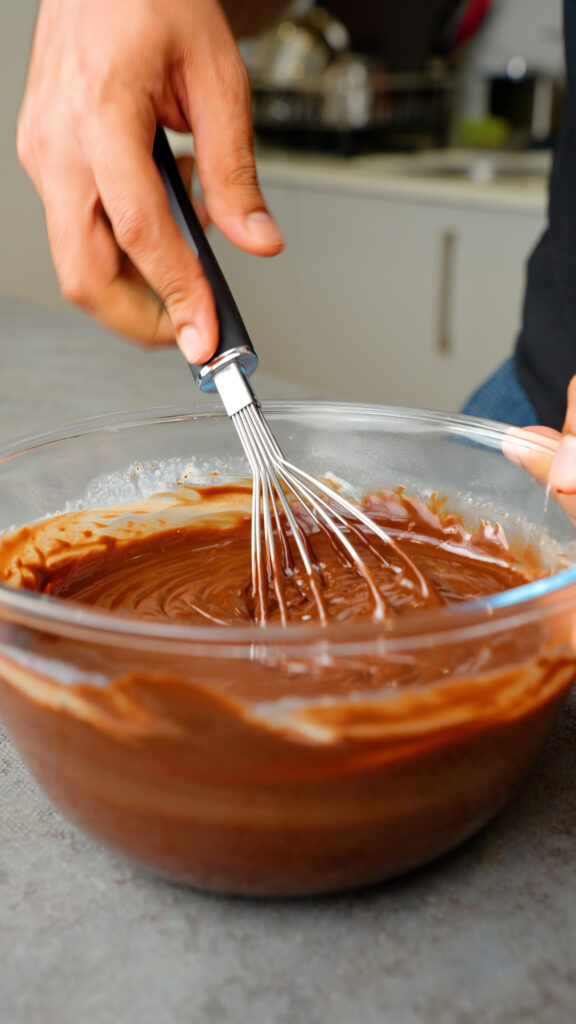
3+4) Allow to sit for 1 minute, then slowly start whisking the cream and chocolate together. I find the most effective way is to start whisking in the middle and then slowly start working outwards
Once it looks smooth, switch to a spatula just to make sure everything has been really well incorporated and no chocolate is left stuck to the bowl
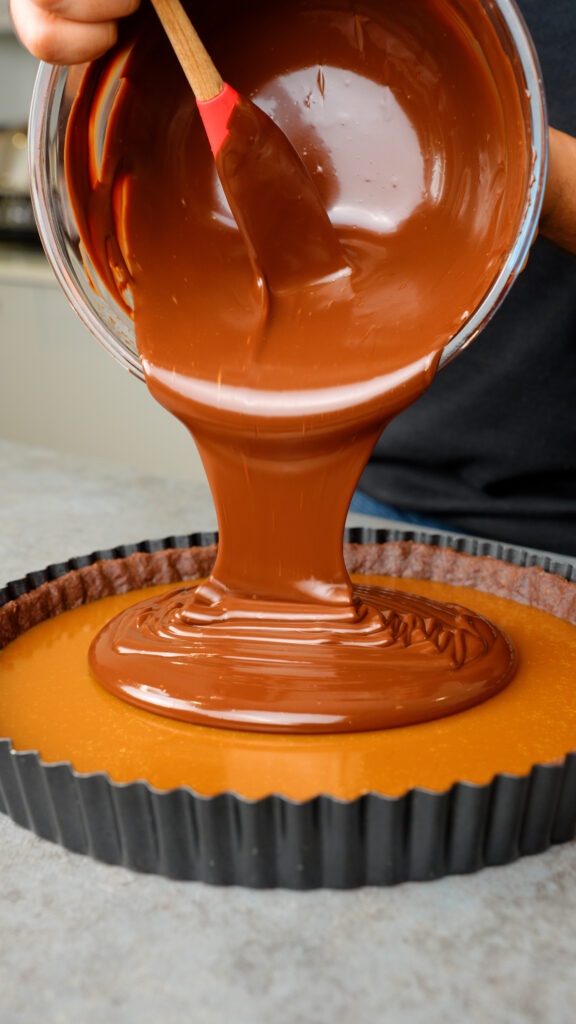
5) Pour the warm ganache over the chilled and set caramel
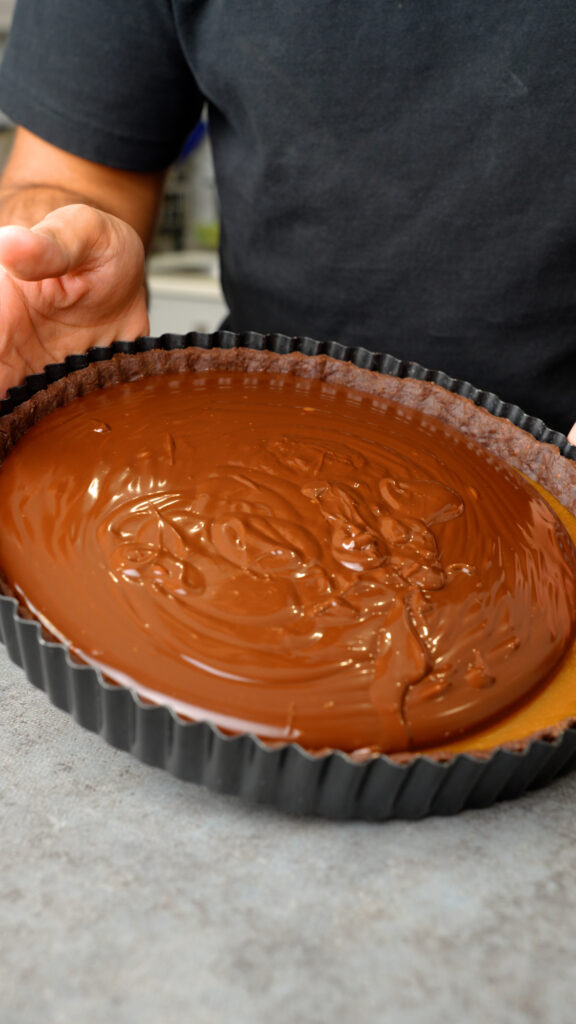
6) Immediately tilt the tin around to spread into an even layer – this will start to thicken fairly quickly so work fast here. Then place back into the fridge to set completely
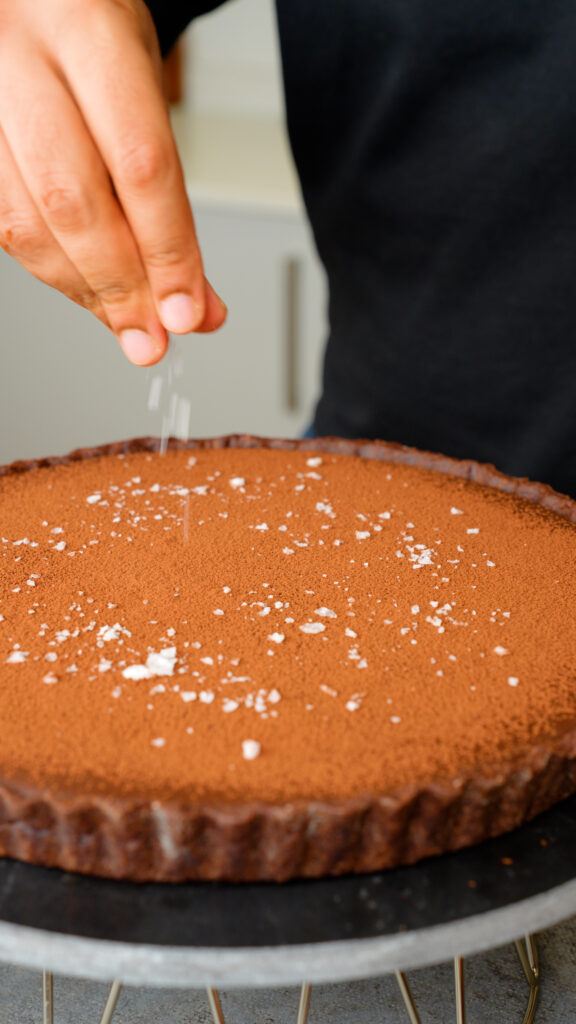
7) Finish with a dusting of cocoa powder and flaky sea salt right before serving
Frequently asked questions
Can this Salted Caramel and Chocolate Tart be made vegan?
Yes it can, I’d recommend substituting the butter in the pastry and caramel for a plant based butter block. The milk in the pastry can be substituted with any plant based milk though I find soya milk always works the best for me.
The cream in the caramel and the ganache can be substituted with a can of coconut milk that has a high percentage of coconut (preferably a minimum of 75%). I’ve made vegan chocolate ganache with coconut milk about 30 times at this point and I can assure you there is no coconut favour.
I have a Dark Chocolate Tart recipe that is made with coconut milk and completely plant-based (even the pastry!). And it’s just pure rich dark chocolate.
How long will the tart keep? And what’s the best way to store it?
It will keep for 4-5 days, however it’s best served within the first 1-2 days. The tart shell starts to lose some of its flakiness after day 2.
Store leftovers in an air tight container and keep refrigerated. Bring up to room temperature when serving.
If you enjoyed this recipe
Please do let me know! Leave a review and a rating below, I’d love to know how you got on.
You can also tag me on Instagram at @dish_by_rish. Or follow me on Facebook, Pinterest, Youtube, and TikTok to keep up with all my cooking and baking creations.
Until then, happy baking!
Salted Caramel Chocolate Tart
This Salted Caramel Chocolate Tart has a chocolate shortcrust base, with a velvety smooth salted caramel, and finally a rich chocolate ganache.
Ingredients
For the chocolate shortcrust pastry
- 185g plain flour/all purpose flour
- 30g cocoa powder
- 40g caster sugar
- 1/4tsp salt
- 120g cold unsalted butter, cut into cubes and frozen for 30 minutes
- 60g cold milk of choice
For the salted caramel
- 200g caster sugar
- 60g unsalted butter,
- 350ml double cream/heavy cream
- 1tsp vanilla bean paste/extract
- 1tsp salt
For the chocolate ganache
- 250g dark chocolate, or your favourite chocolate bar (roughly chopped)
- 300ml double cream/heavy cream
To finish
- Cocoa powder for dusting
- Flaky sea salt
Instructions
For the chocolate shortcrust pastry:
- Add the flour, cocoa powder, salt, and sugar to a food processor. You can also do this without a food processor if you wanted to, just mix it all in a bowl. If using a food processor, give it a quick blitz to get everything well mixed
- Then add in the cold cubes of butter (I place the cubes of butter in the freezer for 30 minutes beforehand to ensure they're completely cold)
- Blitz till the butter is well incorporated throughout. Either a sandy texture or small lumps of butter throughout is what we're aiming for. If mixing by hand, use a pastry blender or fork
- Next add in the cold milk and pulse/mix briefly until incorporated. You'll know it's done when the dough is cohesive and holding together
- Turn the pastry dough out onto the counter. Gather and press the dough together to form a cohesive dough, then flatten into a disc. Try and avoid kneading here as we don't want to develop the gluten
- Wrap the disc tightly in baking paper or cling film and refrigerate for at least 3 hours
- After the dough has chilled, flour the counter as well as both sides of the dough
- Start rolling out the dough from the midpoint down (in one direction), rotate the dough and repeat. Keep rotating and rolling in one direction to avoid cracks forming
- The dough should be no thinner than 3mm and should be about 2 inches larger than the tart tin (we're using a 10" tart tin)
- Flour the dough and your rolling pin, and roll the dough around the rolling pin. Then carefully unroll the dough over your tart tin. Try and line this up well so that the dough is already roughly in place
- Gently press the dough into the crevices and trim off the excess with a sharp knife. Trim off away from the tin to ensure a clean cut.
- Brush off any excess flour then dock all over with a fork. Cover with baking paper or clingfilm and refrigerate for 30-60 minutes (this will reduce shrinkage post baking)
- Pre-heat your oven to 170'C (fan)/190'C (conventional) - 340'F/375'F
- Then place the tart tin onto a larger baking tray, this will help with placing it into the oven and taking it out as tart tins can be fiddly. Scrunch up some baking paper and place on top (the scrunching helps it to get into all the corners), followed by some baking beans/dried beans/dried rice to weight it down (this is called blind baking)
- Place the tart shell into the oven to bake for 20 minutes. After this remove the paper and rice, and place the pastry back into the oven to bake for another 15 minutes. The paper and rice/beans should lift off with ease without any sticking - if it sticks then the pastry is underbaked. Place back into the oven for another 5 minutes and then try to remove the paper and rice. Keep the rice/beans in a separate container and reuse for future blind baking needs
- Once the tart shell has baked, allow to cool for 15 minutes in the tin before carefully removing and transferring to a wire rack to cool completely. Once cooled, place back into the tin for the next steps
For the salted caramel:
- For the caramel, start by melting the sugar in a saucepan over a medium-low heat. Avoid metal utensils here as they can cause the caramel to crystalise. You can however use a silicon spatula to gently move around the sugar to ensure it is all melting evenly
- Once the sugar has melted and caramelised, allow it to reach a deep amber colour. And then immediately add in the butter followed by the double cream/heavy cream. It can splatter so just be careful here
- Also add in the vanilla bean paste/extract and salt at this stage
- Keep whisking and mixing until you're left with a silky, velvety caramel sauce. You may find the caramel seizes and crystalises when adding the cream, keep whisking over a low heat to help it dissolve. You can also place a lid over the saucepan and whisk every 2 minutes until it's fully smooth again. For extra precision (HEAVILY ADVISED), if you have a cooking thermometer take the caramel up to 113'C/235'F
- Allow the caramel to cool for just a few minutes, it should still be pourable but just not extortionately hot. Pour over the chocolate pastry shell and allow to come to cool to room temperature, then refrigerate till completely set (about 2-3 hours)
For the chocolate ganache:
- Place the roughly chopped chocolate of choice into a heat resistant bowl and set aside
- For the ganache, start by placing the cream on a medium-low to low heat. We just want to see gentle bubbling and steam around the outside. If the cream is too hot, it will cause your ganache to split and turn grainy
- Pour the cream over the chocolate
- Allow to sit for 1 minute, then slowly start whisking the cream and chocolate together. I find the most effective way is to start whisking in the middle and then slowly start working outwards
- Once it looks smooth, switch to a spatula just to make sure everything has been really well incorporated and no chocolate is left stuck to the bowl
- Pour the warm ganache over the chilled and set caramel
- Immediately tilt the tin around to spread into an even layer - this will start to thicken fairly quickly so work fast here. Then place back into the fridge to set completely
To finish:
- Finish with a dusting of cocoa powder and flaky sea salt right before serving
Nutrition Information
Yield 12 Serving Size 1Amount Per Serving Calories 630Total Fat 42gSaturated Fat 26gTrans Fat 1gUnsaturated Fat 13gCholesterol 103mgSodium 319mgCarbohydrates 58gFiber 3gSugar 34gProtein 7g
This is an automated calculation and hence may not be entirely accurate.


9 Comments
Jeffrey Schpero
December 23, 2023 at 12:40 pmRishi,
Your instructions were right on. I made the caramel chocolate tart and it looks amazing. I will send some photos after we cut into it.
dishbyrish
December 25, 2023 at 12:25 amThank you so much for the feedback! I hope you love it 🙂
Juan Carlos
January 1, 2024 at 8:31 pmThank you so much for the recipe. I would like to tell you that I have made the recipe exactly and I have not been able to make it thicken, it has been lighter and more liquid than I would have liked. How long does it take to thicken?
dishbyrish
January 1, 2024 at 9:52 pmHi Juan! Is that for the caramel layer? If it’s a lighter colour it means it wasn’t allowed to caramelise enough – it needs to reach a deep amber colour before adding in the butter and cream. It then has to be heated to 113’C. Providing it reached this temperature, the caramel would still set at room temperature but I recommend refrigerating as per the recipe for a quicker and firmer set. If your caramel hasn’t set and appears to be runny, it means it wasn’t taken to 113’C.If you follow me on any of the social media platforms – feel free to message and send over any photos to troubleshoot. I hope this helps!
Juan Carlos
January 2, 2024 at 1:35 pmIt happened to me in the caramel layer (I let it turn amber) and in the chocolate Ganache layer, in both. Thanks.
dishbyrish
January 3, 2024 at 1:25 amthen it sounds like it’s an issue with the cream. It may have too low of a fat percentage, just double check it’s got at least 36% fat
Dani Rosen
January 27, 2024 at 9:57 amI had the same experience. The tart tasted fantastic but was very liquid on the two times I’ve made it. I did let the caramel to reach a deep amber color before adding the butter but didn’t check its temperature.
I also used 38% cream so I don’t know. I thought that maybe I should have whisked it longer though when I did it didn’t feel like it was thickening, only staying liquid (after adding the cream)
Thanks.
dishbyrish
January 27, 2024 at 6:12 pmThe temperature is the key for determining the final texture. Caramel texture will vary drastically based on the temp. At 113’C the caramel will set even at room temperature, and will be even firmer refrigerated. Definitely a temperature issue there, if the caramel temperature is too low, it will be a caramel sauce rather than set.
Emma
May 11, 2024 at 12:58 pmAbsolutely fabulous recipe! I followed as directed and tart turned out; even on the first try! I would note that the listed ‘prep time’ is a little misleading. The 45min estimate seems to reflect active prep time, when in reality preparation is upwards of 7 hours including rest and time for refrigeration.