Red Velvet Cake
This Red Velvet Cake recipe is proof that it’s far more than ‘just a chocolate cake’. The combination of the fruity cocoa notes, subtle tang of buttermilk, and delicate vanilla undertones makes this cake truly irresistible. Now, add in the rich cream cheese frosting and you’re on to a winner.

What is a Red Velvet Cake?
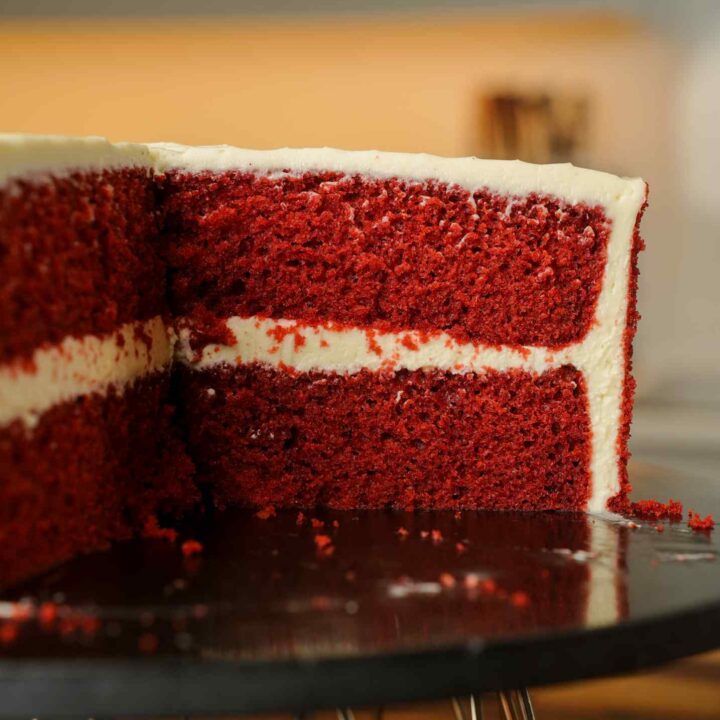
This is one of those classic bakes that never fails to impress. It all starts with soft, tender red velvet cake layers that are delicately flavoured with cocoa and vanilla. The addition of buttermilk and vinegar not only provide subtle tartness for balance, they also assist in creating a very plush crumb.
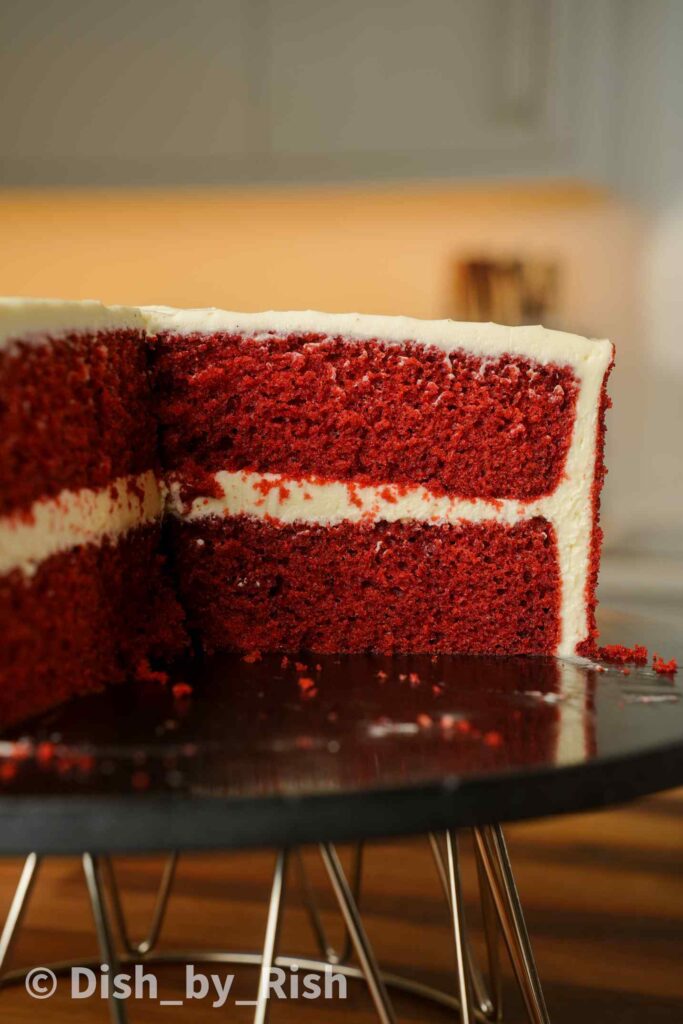
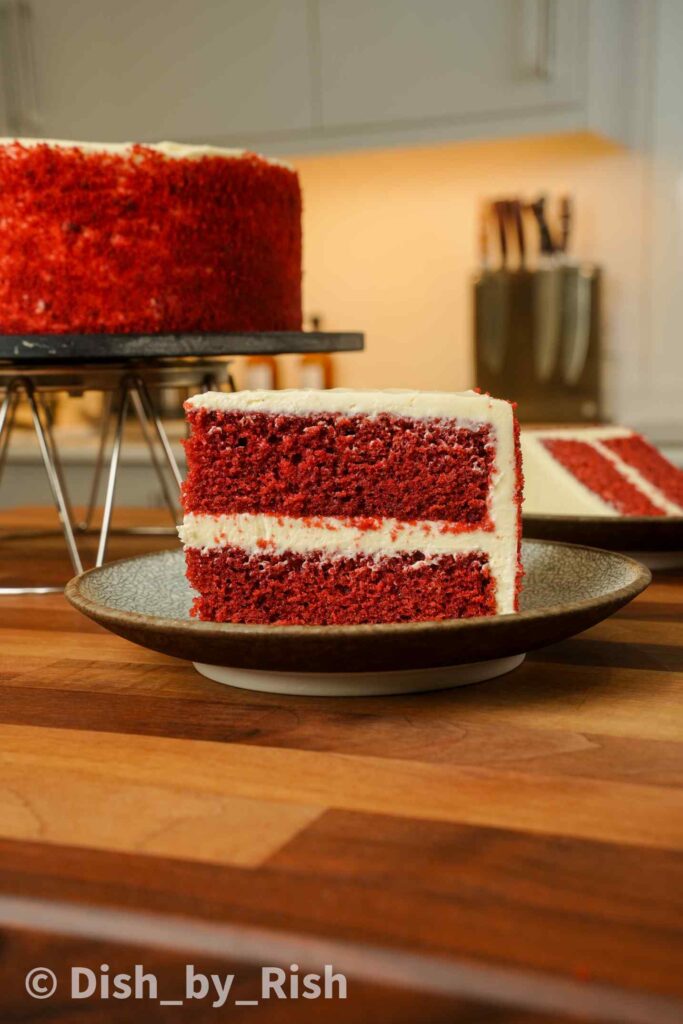
These cake layers then get sandwiched together and covered with a cream cheese frosting. The vibrant red hue, balance of flavours, and the quintessential tang of the frosting make it both visually stunning and deliciously satisfying.
So, what does Red Velvet Cake actually taste like?
Red velvet cake has quite a unique flavour profile. It’s neither a typical chocolate cake, nor a typical vanilla cake. There’s definitely a background note of fruity cocoa paired with the aroma and flavour of vanilla, plus an edge of tang (thanks to the buttermilk and vinegar!)
It’s also worth mentioning that the percentage of cocoa in a red velvet cake is substantially lower than what you would use in a chocolate cake – we’re talking 2-8% vs 20-40%. The type of cocoa also varies, red velvet traditionally uses a natural cocoa while a chocolate cake typically favours a Dutch processed cocoa.
Natural cocoa, with an acidic pH of 5-6 tends to carry more fruity and tart notes. On the other hand, Dutch processed has an alkaline pH of 7-8 along with deeper, nuttier, and more earthy notes. A traditional red velvet should be made with natural cocoa in order to produce the intended flavour.
What makes cream cheese frosting so good?
Unlike a standard buttercream which relies solely on butter and icing sugar/powdered sugar. The addition of cream cheese also adds tanginess and additional richness. It really does provide a necessary balance and contrast.
Vanilla and salt are also non-negotiables here! Salt is key for bringing flavours forward as well as balancing. Follow all the steps perfectly and I promise you’ll be left with a luscious, smooth frosting that’s incredibly moreish. It’s rich yet light, and it spreads beautifully for that effortlessly elegant finish.
Ermine frosting vs. cream cheese frosting
Traditionally, Red Velvet Cake was made with Ermine frosting rather then cream cheese frosting. This is also known as boiled milk frosting or flour frosting. It’s a rather old-school frosting dating back to the early 1900s.
Ermine frosting starts with cooking flour and milk together to form a thick roux, which is then cooled and whipped with butter and sugar to create a light, silky, and fluffy frosting. It’s subtly sweet, buttery, and has a texture almost like whipped cream. As it doesn’t contain cream cheese, it lacks that edge of tang and richness.

Cream cheese frosting, as we discussed earlier, is tangier, denser, and richer. It’s created a flavour balance that many now consider iconic. It’s also quicker to make, requiring no cooking or cooling time.
So, which is better? It really depends on your taste preference. If you prefer something light, buttery, and delicately sweet, ermine frosting is worth considering. But if you love a creamy, tangy contrast that cuts through sweetness (like me!), cream cheese frosting should be your go-to. Both are delicious in their own right and either will make your red velvet cake shine.
Why you’ll love this Red Velvet Cake
- A very plush, moist, and tender crumb – I have a few tips and tricks in my recipe that make this cake exceptionally good
- Perfect balanced flavours – highlights the fruity cocoa, vanilla, and buttermilk tang
- Smooth and creamy vanilla cream cheese frosting – that actually has a lower sugar ratio and higher cream cheese ratio than most recipes
- My tips on how to make a stable cream cheese frosting – this is very important for UK readers where the cream cheese is the spreadable variety and prone to becoming runny
- Easy to make and ideal for any celebration – birthdays, Valentine’s Day, weddings, or a weekend treat
Let’s talk about some of the ingredients
I’ll cover the main ones below but the full recipe can be found at the end.
- Plain flour/All purpose flour
- Natural cocoa powder – this is the traditional cocoa used in red velvet cake. It’s acidic with a more fruity flavour, while Dutch processed has been neutralised. Natural cocoa reacts with the baking soda, and will also impart a natural red hue
- Baking powder AND baking soda
- Butter
- Neutral oil – i.e. a flavourless oil such as sunflower/vegetable/rapeseed
- Large eggs – I always use large eggs when baking, which is generally the standard size. In the UK, each large egg will weigh between 63-73g. These may be classed as extra large eggs in the USA
- Full fat milk powder – also commonly sold as full cream milk powder. This adds tenderness, richness, moisture, and improves the overall structure
- Buttermilk – essential for keeping the cake moist and enhancing the slight tang. Store bought buttermilk is cultured and far superior to homemade substitutes (which are often too acidic and won’t provide the same results)
- White vinegar – reacts with the baking soda and also provides extra acid along with the buttermilk for a more pronounced ‘tang’
- Red food colouring – optional but traditional. It gives the cake that iconic vibrant red colour – I use the one by the brand ‘Sugarflair’
- Cream cheese – use full fat cream cheese for the frosting for stability and to provide a rich and creamy texture. Avoid low fat versions as they can make the frosting runny
The key tips for making this cake
- Bloom the cocoa – blooming in hot liquid or fat allows for deeper and more complex flavour compounds to be released. There is also a slightly superior texture with bloomed vs unbloomed
- Room temperature ingredients – this allows the ingredients to mix more readily and more evenly, for a better emulsion
- Don’t mix all the wet ingredients all at once – having a mixing order allows for even distribution of ingredients and uniformity
- Do not overmix – once you add the flour, mix only until combined. Over working the batter creates gluten which leads to a tougher cake
- Bake until just done – overbaking can dry out your cake. Check by inserting a skewer/toothpick into the centre – it should come out clean or with a few moist crumbs
- Use full fat cream cheese – this ensures your frosting is thick, stable, rich, and creamy. Low fat alternatives lack this stability and are prone to splitting, which causes the frosting to become runny
How to make this Red Velvet Cake
For the Red Velvet Cake batter
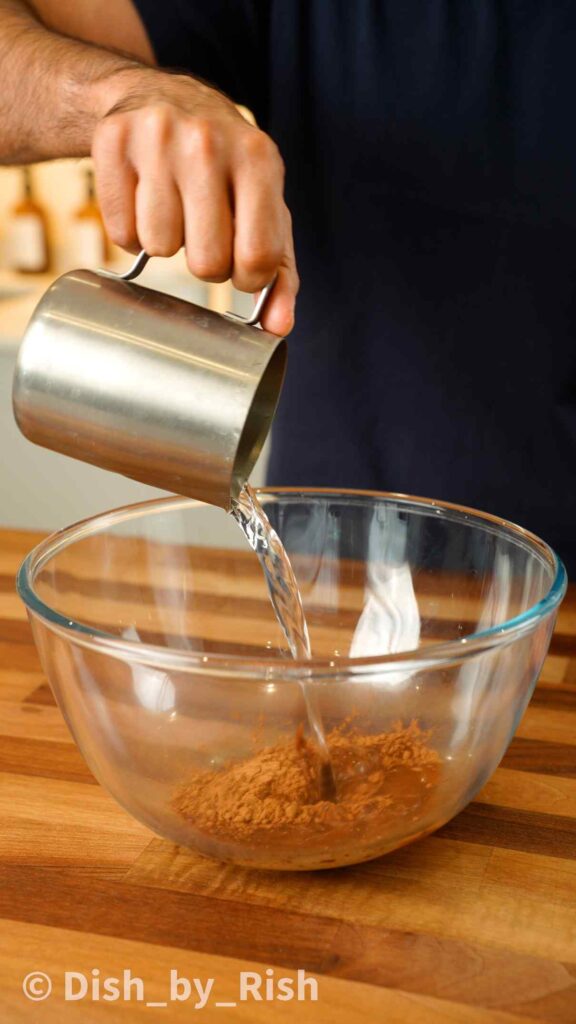
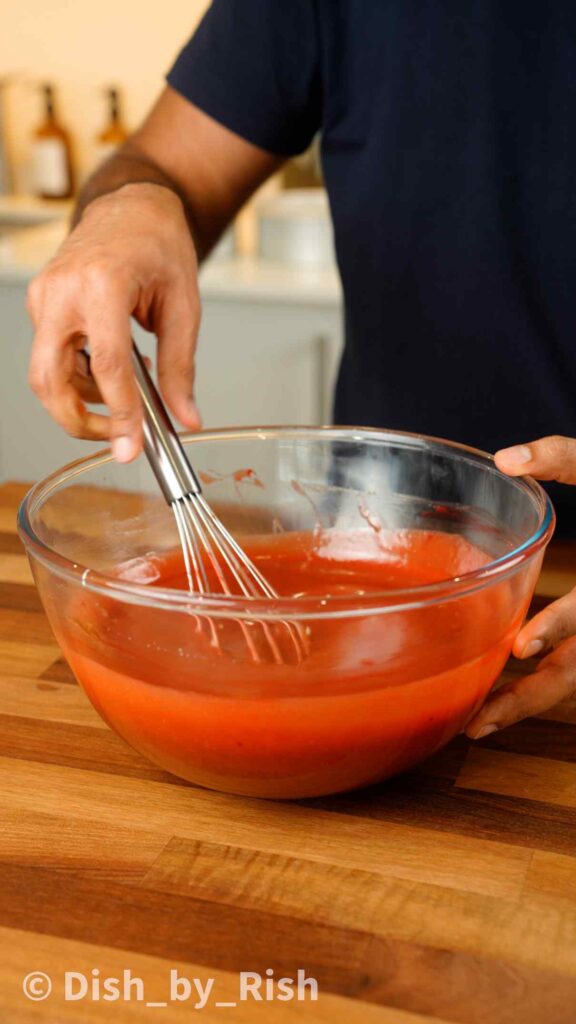
Start by blooming the cocoa. To do this, simply pour hot water over the cocoa and whisk to dissolve. Allow to stand for 5 minutes
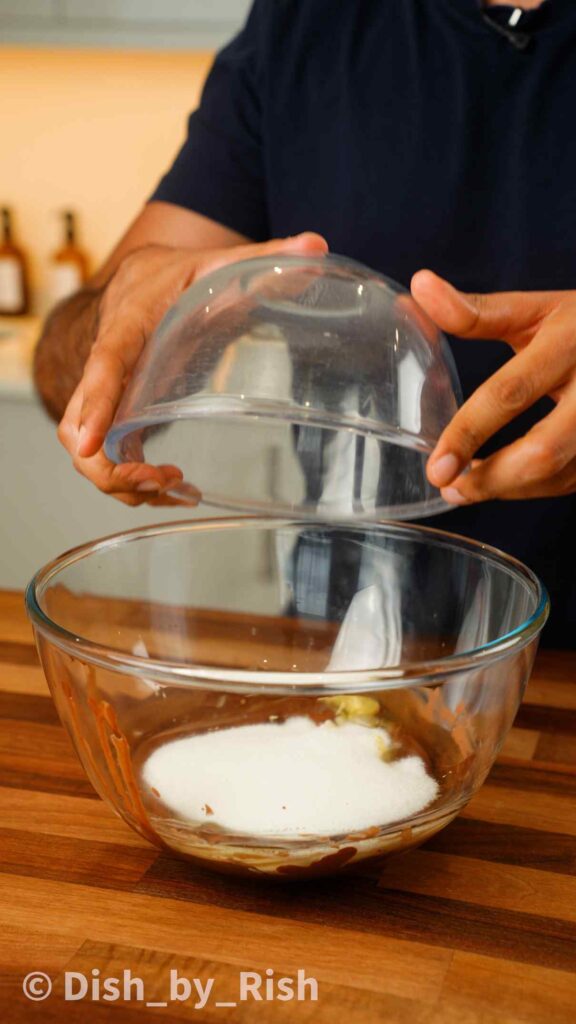
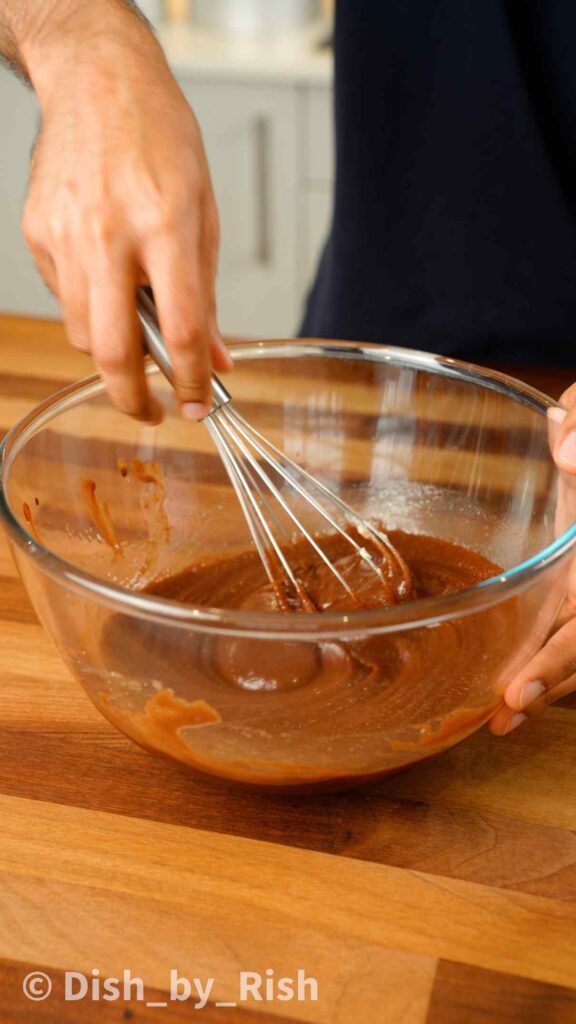
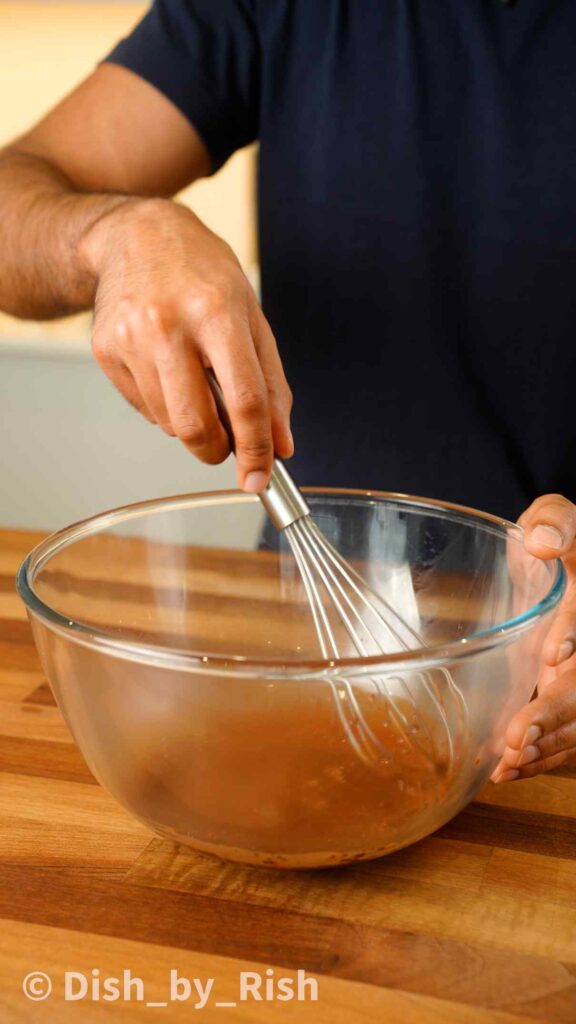
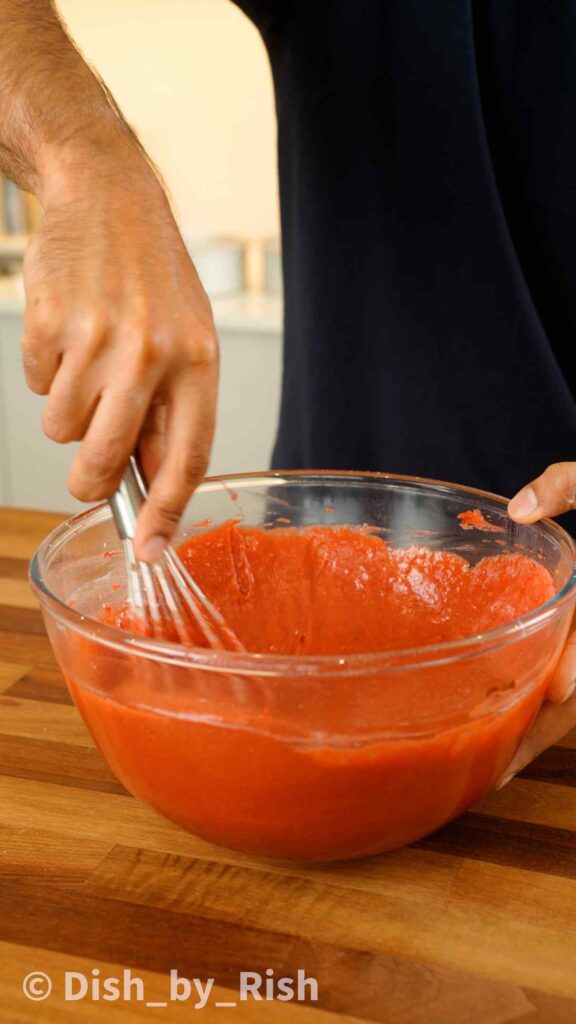
Add in the butter, oil, and sugar, and whisk to combine
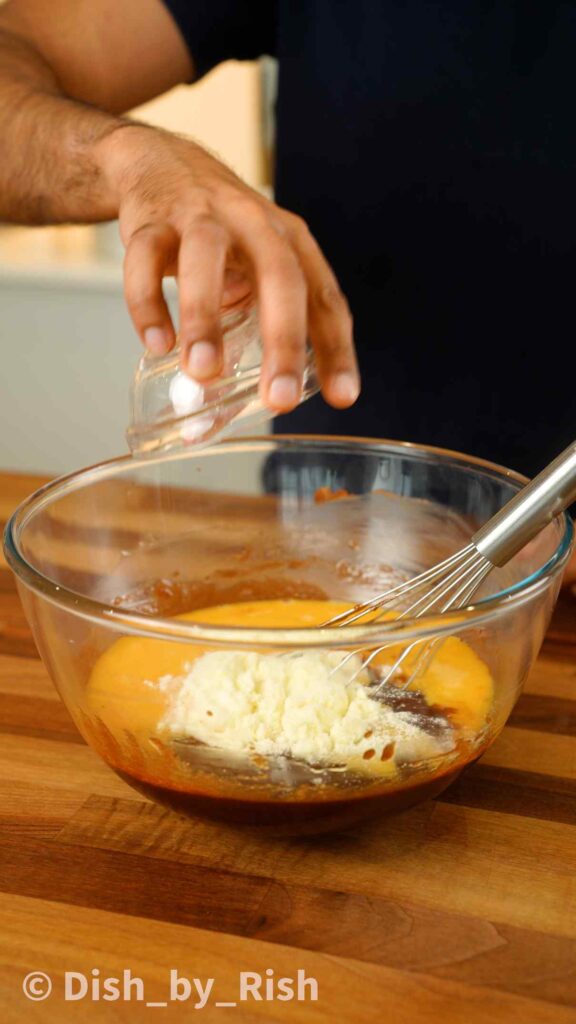
Next, add in the eggs and milk powder, and whisk well once again
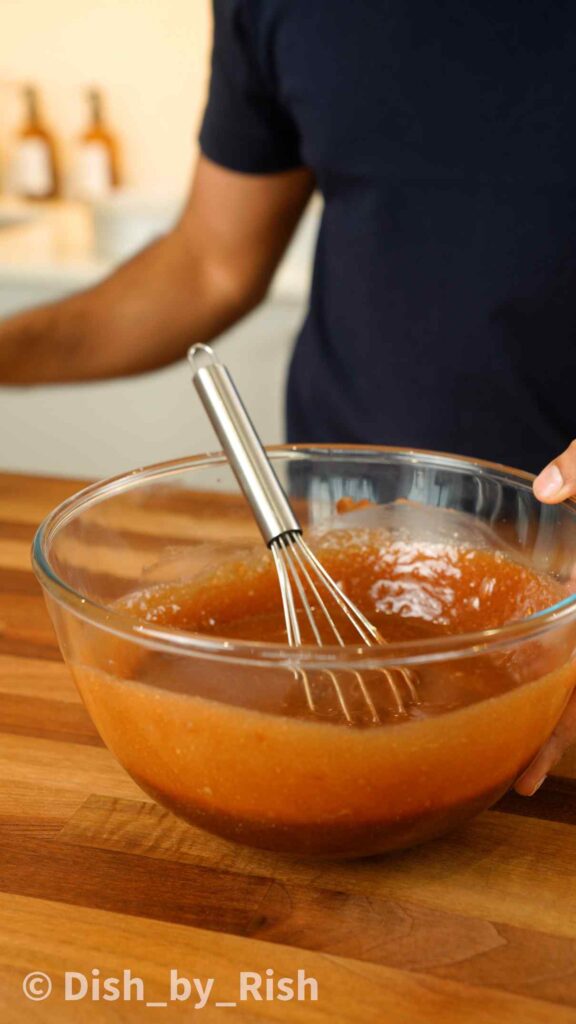
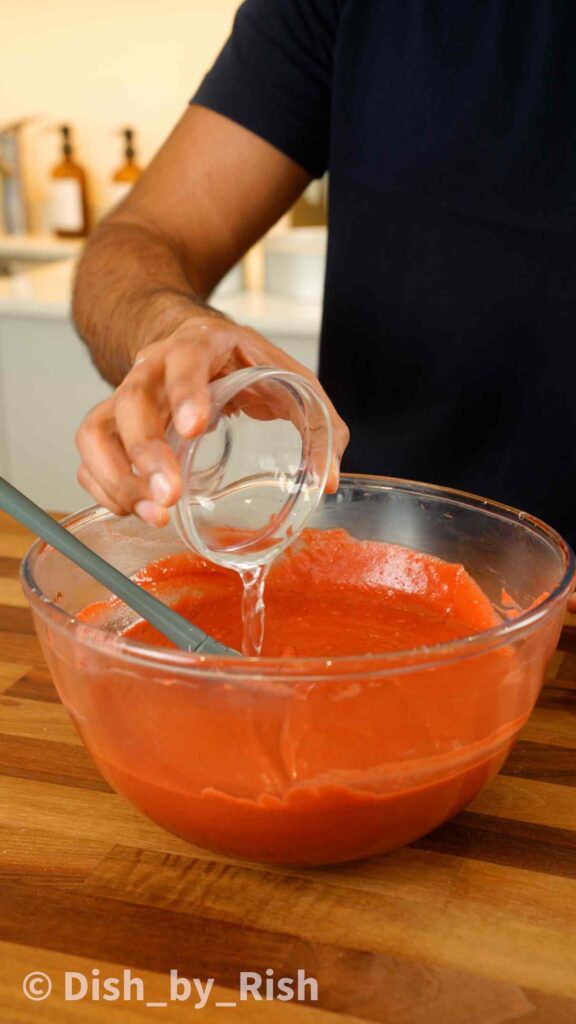
Pour in the buttermilk along with the red food colouring and whisk well to combine

Sift in the flour, baking powder, baking soda, and salt. Whisk to incorporate, and then finish by folding the batter with a spatula to ensure no dry flour remains
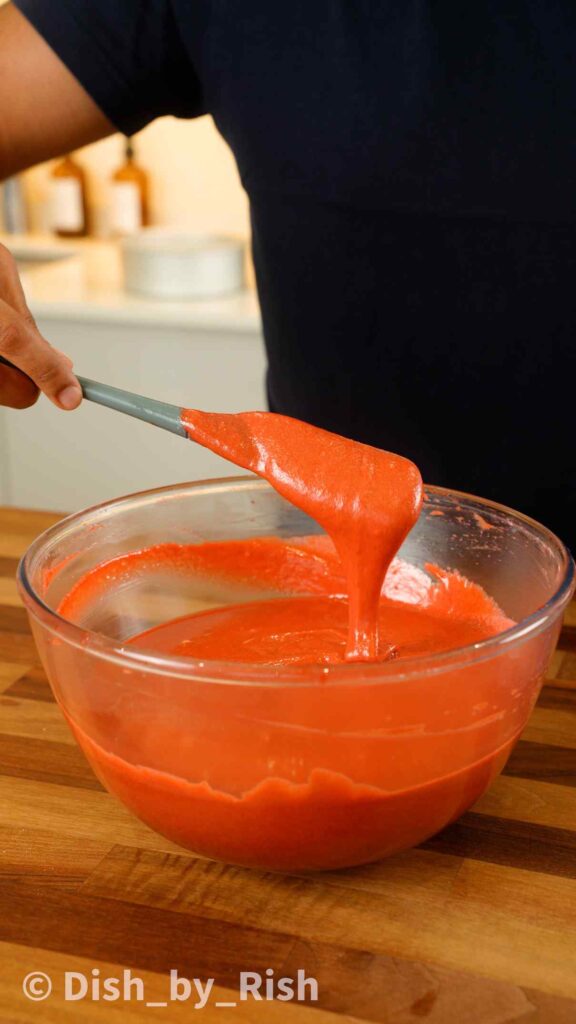
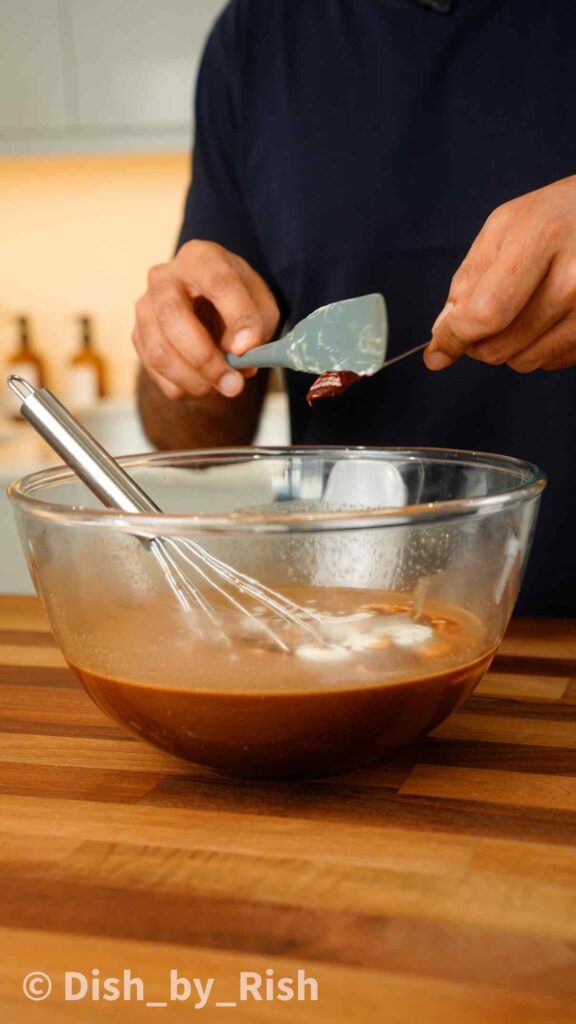
Finally, pour in the vinegar and fold to incorporate
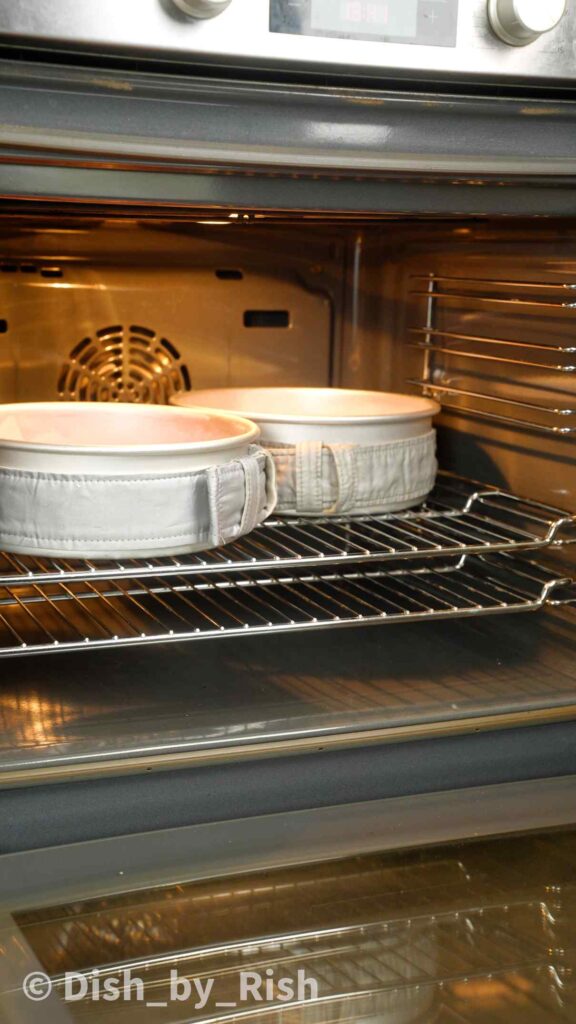
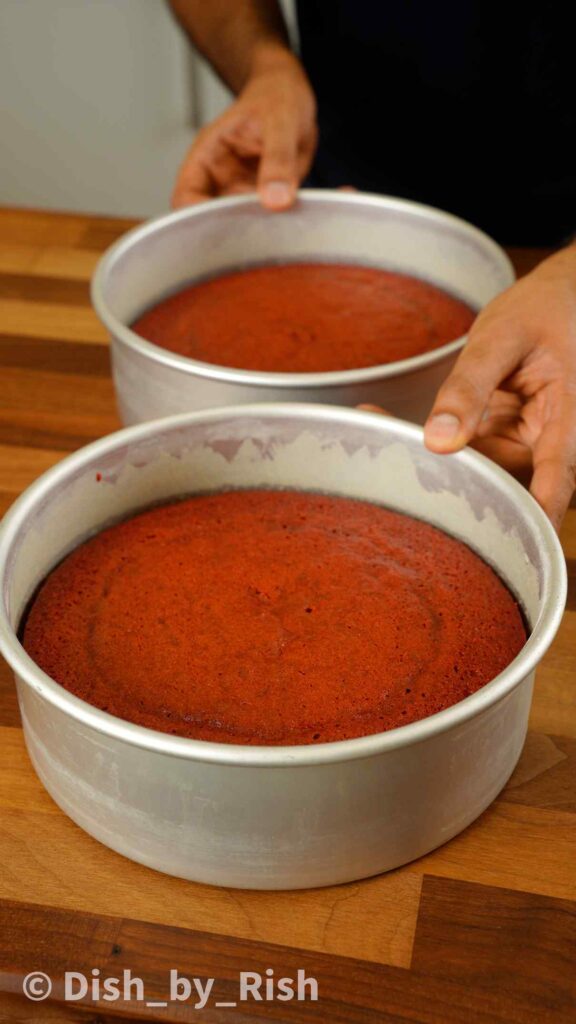
Split the batter equally between two 8″ tins and transfer to the oven to bake. I like to use cake strips around the outside of the tins to ensure an even and level bake
For the cream cheese frosting
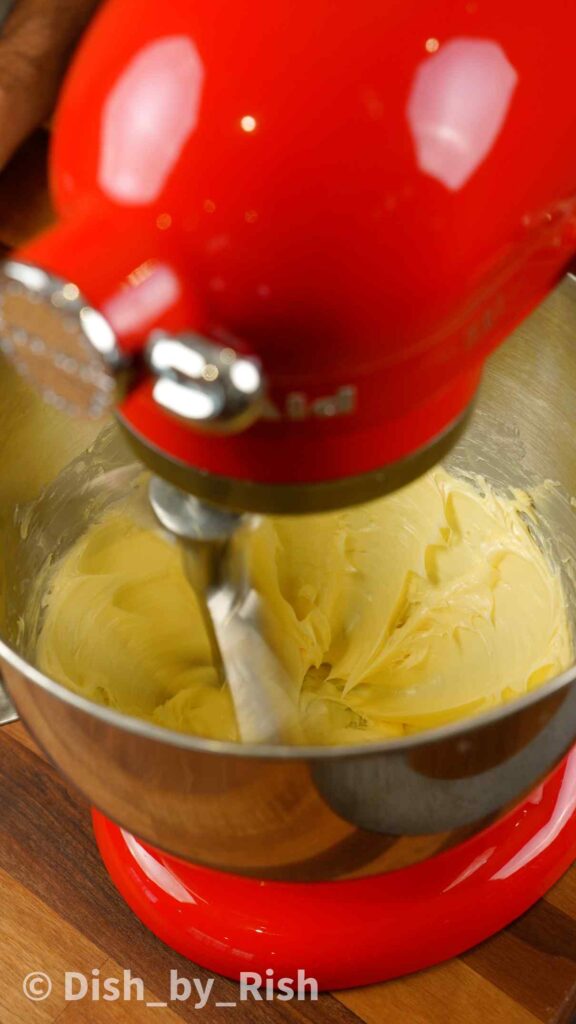
Cream the butter with a paddle attachment for around 5 minutes or until slightly pale. Then, add in the vanilla, salt, and icing sugar, and continue to mix on low speed until incorporated

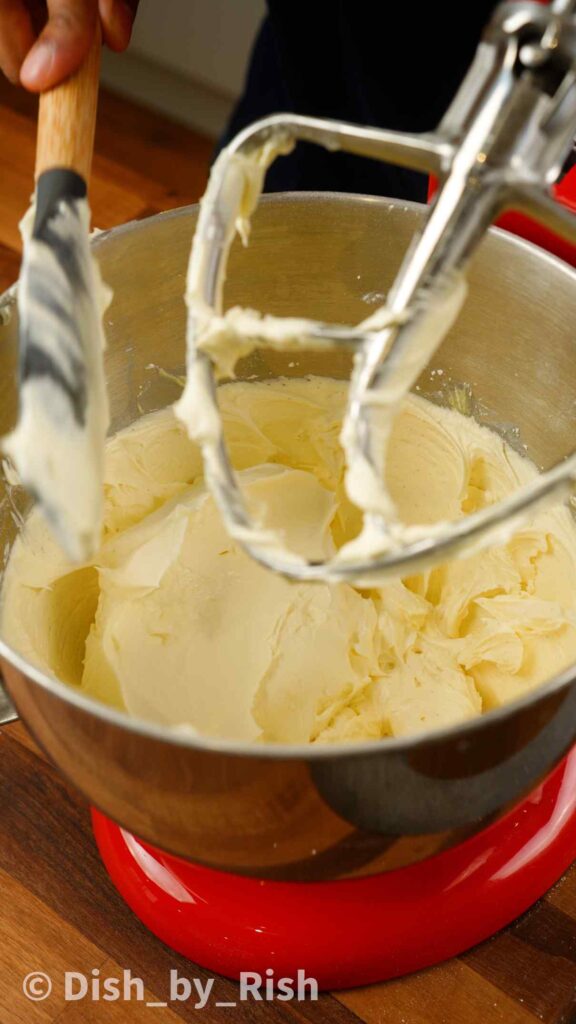
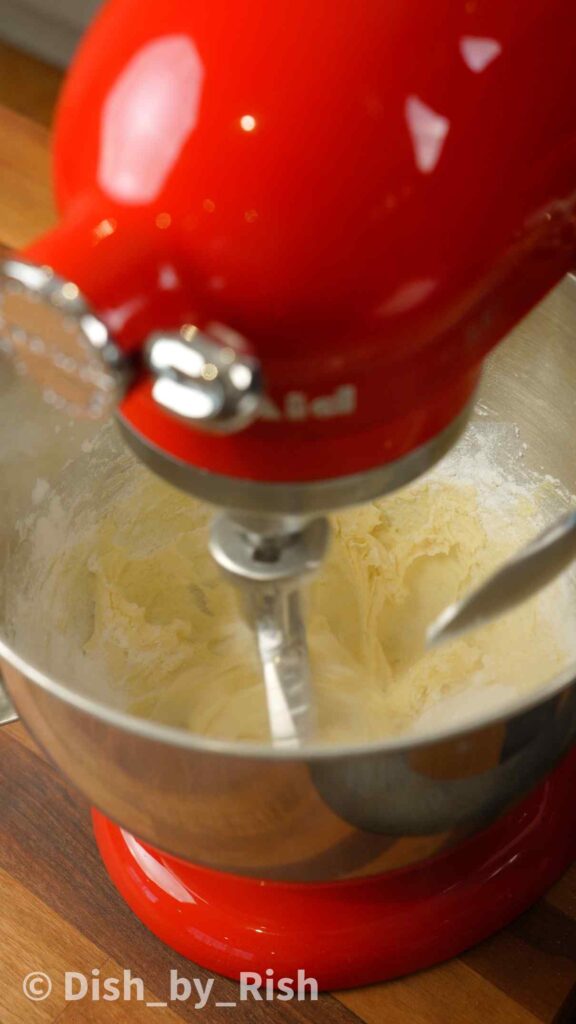
Once incorporated, mix on medium speed for a further 5-7 minutes. Stop every minute or so to scrape the base of the mixer. Finally, add the cream cheese and mix on the slowest speed until incorporated
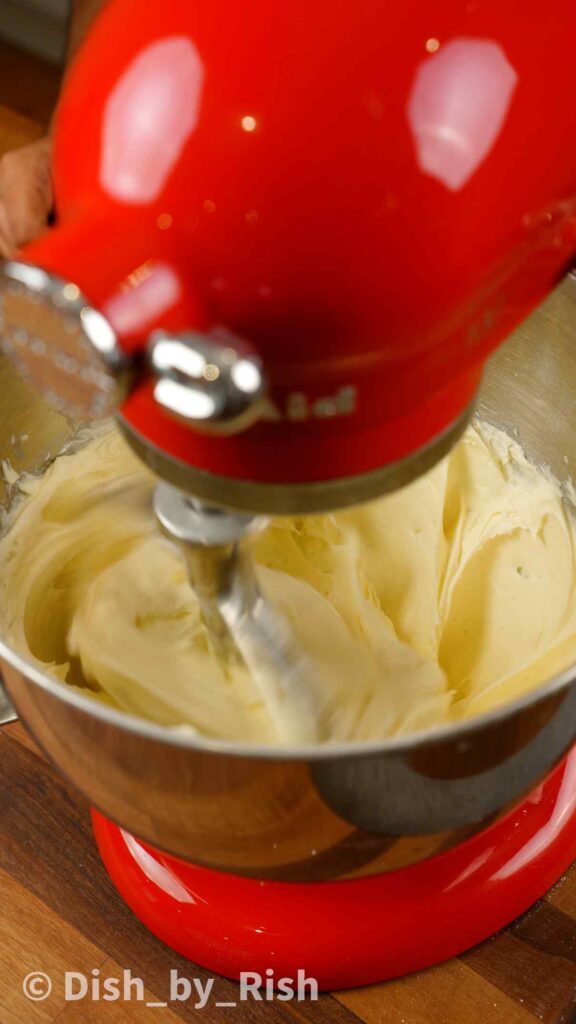
Avoid over-mixing here as that can cause the cream cheese to start to split – this will then lead to the frosting loosening up
Assembling the Red Velvet Cake
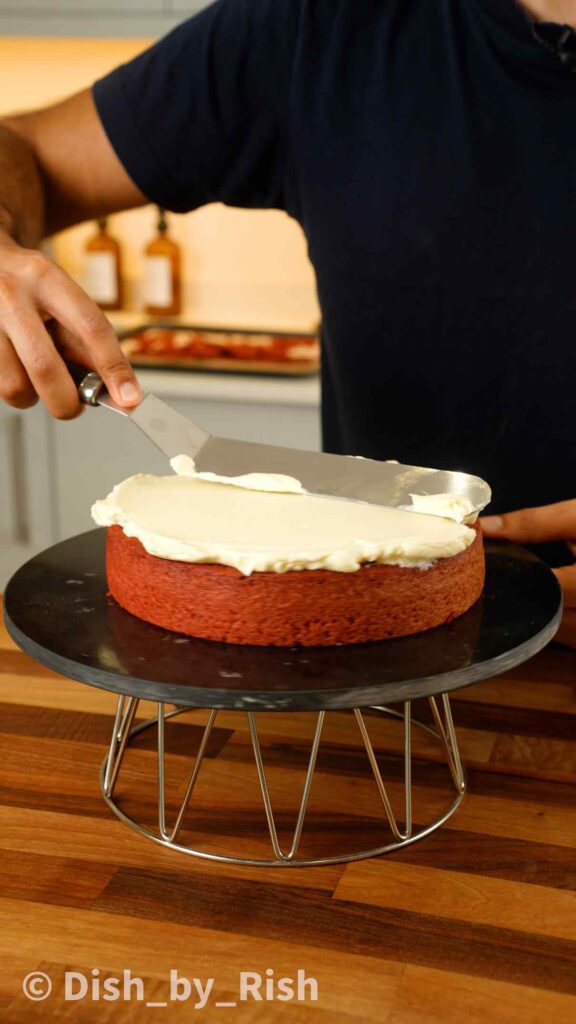
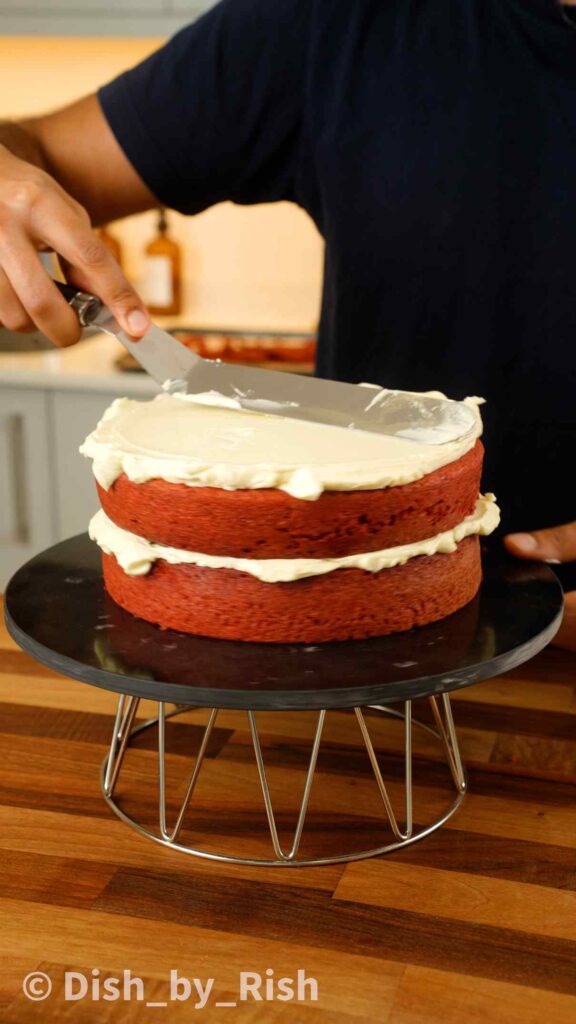
I sliced off the top 1mm of each cake layer and dried these out in the oven to use as cake crumbs later. Layer the cake with cream cheese frosting
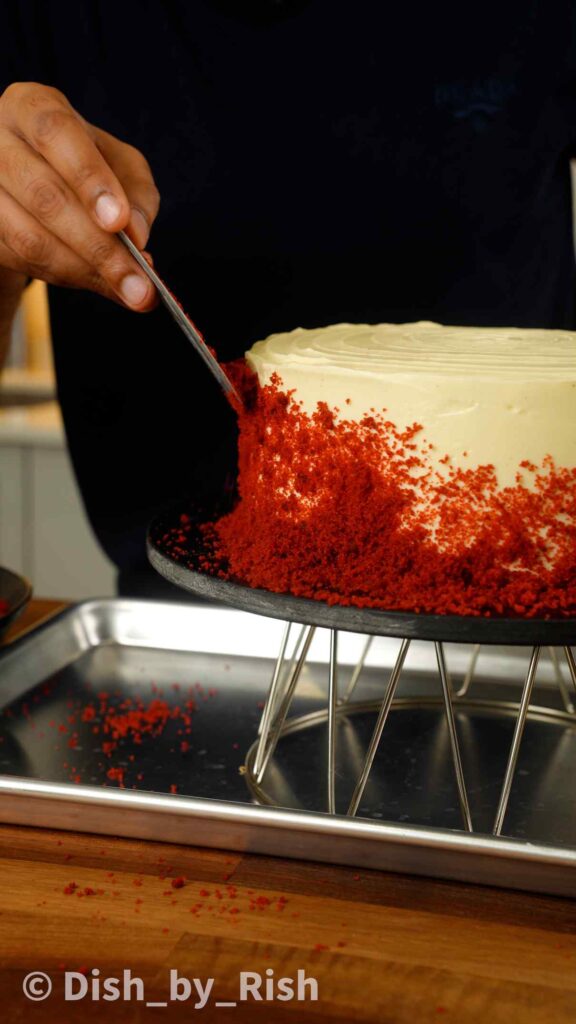
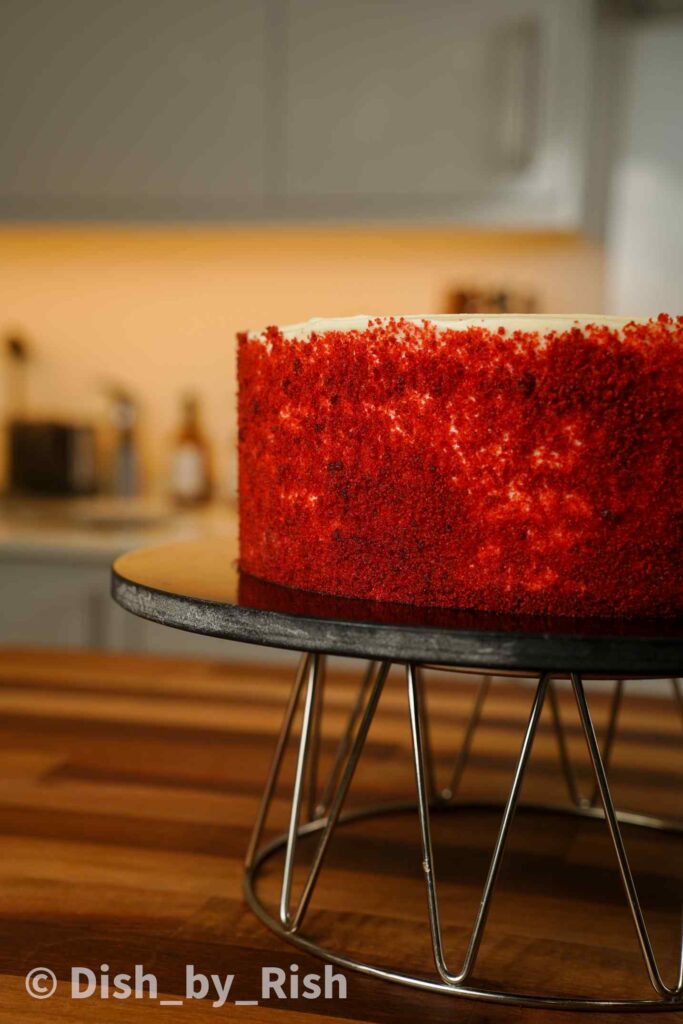
Blitz the dried cake pieces in a blender until they form a coarse powder. Use these to decorate the sides of the cake for that signature red velvet finish
Frequently asked questions
How long will this Red Velvet Cake keep?
This cake will keep for up to 5 days refrigerated in an airtight container. For the best texture, bring it to room temperature before serving.
Can I freeze red velvet cake?
Slices can be covered tightly in clingwrap, placed in an airtight container, and frozen for 3-4 months. Thaw completely before consuming. I’ve currently got a few red velvet cake slices in my freezer, they taste just as good as fresh once thawed!
If you enjoyed this recipe
Please do let me know! Leave a review and a rating below, I’d love to know how you got on.
You can also tag me on Instagram at @dish_by_rish. Or follow me on Facebook, Pinterest, Youtube, and TikTok to keep up with all my cooking and baking creations.
Until then, happy baking!
Red Velvet Cake Recipe
Red Velvet Cake
This moist and plush Red Velvet Cake is made with cocoa, vanilla and tangy buttermilk. Topped with the perfect vanilla cream cheese frosting.
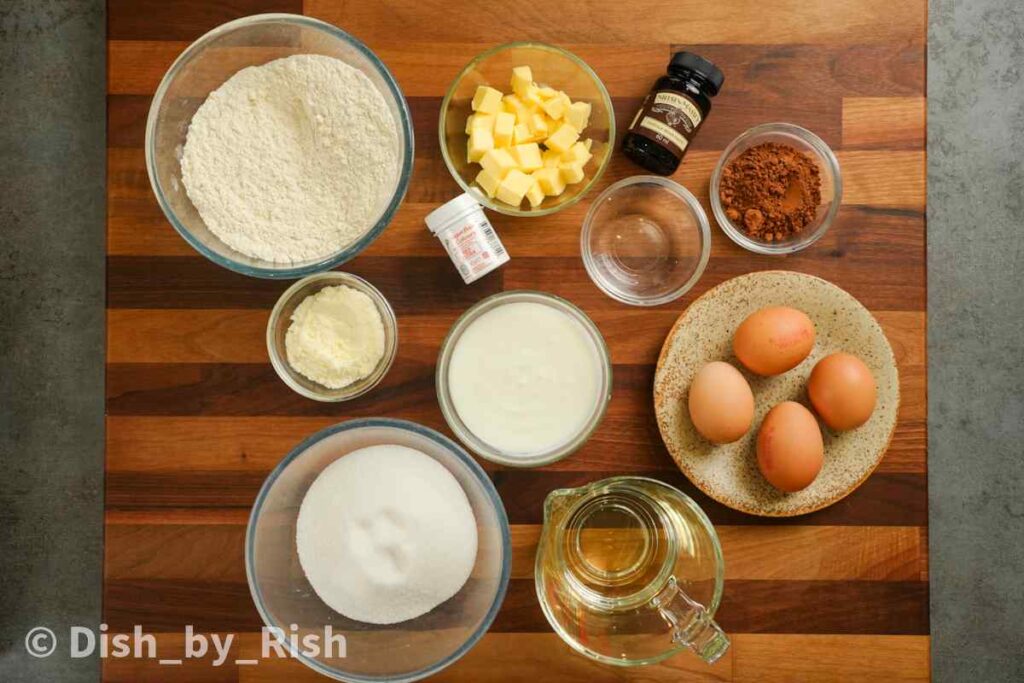
Ingredients
For the cake:
- 280g plain flour/all purpose flour
- 20g natural cocoa - Dutch processed will work but will produce a slightly different flavour, texture, and colour
- 8g baking powder
- 2g baking soda
- 1+1/2 tsp salt
- 225g whole eggs, (approx. 4 large UK eggs, these may be classed as extra-large in the US)
- 80g unsalted butter, softened
- 140g neutral oil, e.g. sunflower/rapeseed/vegetable
- 280g white granulated sugar
- 2tsp vanilla bean paste/extract
- 60g hot water
- 160g buttermilk
- 2 tsp red food colouring, I use Sugarflair
- 20g full fat milk powder (non fat/skimmed will also work but will lack the richness)
- 10g white vinegar (2 tsp)
For the cream cheese frosting:
- 200g unsalted butter, softened
- 200g icing sugar
- 2 tsp vanilla bean paste/extract
- 1/4 tsp salt
- 450g full fat cream cheese, cold (5-10 minutes out of the fridge)
Instructions
For the red velvet cake batter:
- Preheat the oven to 150'C (fan)/170'C (conventional) - 300'F (fan)/340'F (conventional) and grease and flour 2 x 8 inch round cake tins
- Start by blooming the cocoa, which helps to extract more flavourful compounds. To do this, simply pour the 60g hot water (just off the boil) over the cocoa in a large mixing bowl and whisk to dissolve. Allow to stand for 5 minutes
- Next, add in the butter, oil, and sugar, and whisk to combine. We're not creaming/aerating the mixture, so just whisk well until it's fully incorporated
- Then, add in the eggs and milk powder, and whisk well once again
- Pour in the buttermilk along with the red food colouring and whisk well to combine. At this stage, it should be a more vibrant shade of red than the final colour you want, so adjust accordingly based on your brand of food colouring. Whisk a touch more in, if required
- Sift in the flour, baking powder, baking soda, and salt. Whisk to incorporate, and then finish by folding the batter with a spatula to ensure no dry flour remains
- Finally, pour in the vinegar and fold to incorporate
- Split the batter equally between the two tins and transfer to the oven to bake for 35 minutes, or until a skewer comes out clean. I like to use cake strips around the outside of the tins to ensure an even and level bake
- Allow the cakes to cool in the tins for around 5 minutes before flipping out onto a wire rack. Allow to cool completely. Once cooled completely, they can be wrapped in clingwrap and refrigerated if decorating on a separate day
For the cream cheese frosting:
- Cream the softened butter in a stand mixer with the paddle attachment on a medium low speed for around 5 minutes or until slightly pale. Then, add in the vanilla, salt, and icing sugar, and continue to mix on low speed until incorporated
- Once incorporated, mix on medium speed for a further 5-7 minutes. Stop every minute or so to scrape the base of the mixer and give everything a once over
- Place the just-out-of-the-fridge cream cheese into a separate bowl and lightly beat with a spatula to soften (20 seconds is all it requires). Add the cream cheese to the buttercream and mix on the slowest speed until incorporated. Avoid over-mixing here as that can cause the cream cheese to start to split - this will then lead to the frosting loosening up
Assembling the red velvet cake:
- Optional: To make the cake crumbs, slice off the top 1mm of each cake layer and place them onto a lined baking sheet. Bake in a preheated oven set to 100'C (fan)/120'C (conventional) - 210'F (fan)/250'F (conventional) for approx. 10-20 minutes or dry to the touch. Allow these to cool completely before blitzing in a blender/food processor to form coarse crumbs. Don't blitz for too long, otherwise it may end up forming a paste. This is a moist cake, which is why I recommend drying the slices slightly
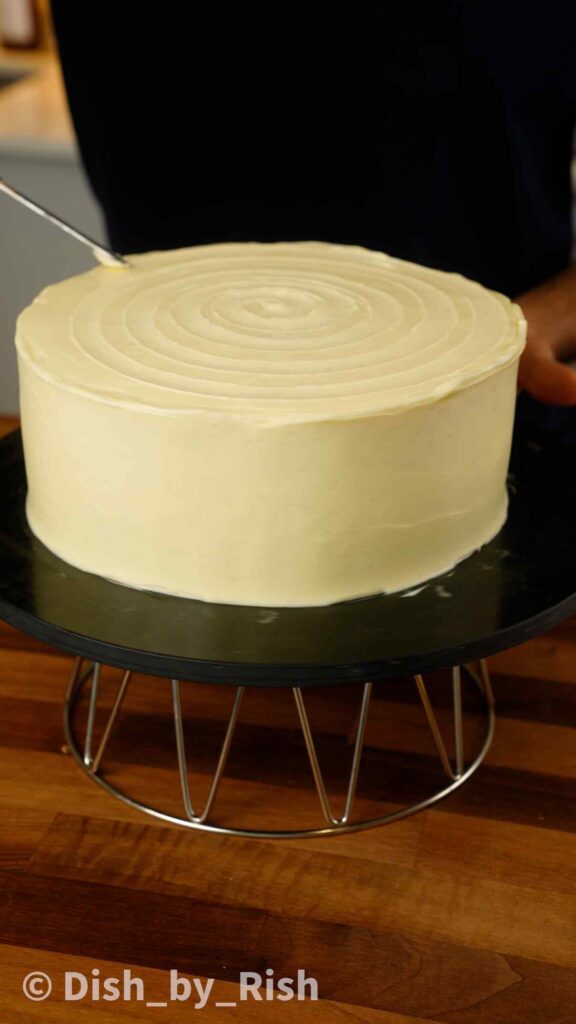
- Cover the first layer of cake with cream cheese frosting. Top with the second layer and spread the remaining frosting over the top and sides. I use a small offset spatula to create a simple swirl pattern on the top of the cake
- Place the cake crumbs around the sides of the cake/on top if preferred
- Optional: Refrigerate the decorated cake for around 30 minutes for the frosting to firm up. This will help with ensuring clean slices
Notes
Frequently asked questions
How long will this Red Velvet Cake keep?
- This cake will keep for up to 5 days refrigerated in an airtight container
- For the best texture, bring it to room temperature before serving.
Can I freeze red velvet cake?
- Slices can be covered tightly in clingwrap, placed in an airtight container, and frozen for 3-4 months
- Thaw completely before consuming. I've currently got a few red velvet cake slices in my freezer, they taste just as good as fresh once thawed!
Nutrition Information
Yield 12 Serving Size 1Amount Per Serving Calories 792Total Fat 55gSaturated Fat 27gUnsaturated Fat 28gCholesterol 186mgSodium 672mgCarbohydrates 61gFiber 1gSugar 42gProtein 14g
Note: This is an automated calculation and hence may not be entirely accurate.